How to Grill Thick Steaks: The Complete Science-Based Guide
How to Grill Thick Steaks: The Complete Science-Based Guide
A one-inch steak and a two-inch steak are not the same animal. Not figuratively — they literally behave differently when heat hits them.
Most grilling advice assumes a standard 1-inch cut. Follow that advice with a thick steak and you will end up with a charred exterior, a raw center, and the sinking feeling that you just wasted an expensive piece of beef. The physics change when thickness increases, and your technique needs to change with it.
This guide covers everything you need to know about grilling steaks 1.5 inches and thicker — the science behind why thickness matters, the exact methods that work, and the temperatures you need to hit.
Why Thickness Changes Everything
Heat moves through meat at a fixed rate. It does not care how hungry you are or how hot your grill is — the thermal diffusivity of beef is approximately 1.3 × 10⁻⁷ m²/s. That number governs how fast the center of your steak reaches target temperature.
Here is the critical relationship: doubling the thickness quadruples the cooking time when using the same heat source. This is not linear. A 2-inch steak does not take twice as long as a 1-inch steak — it takes roughly four times as long for the center to reach the same temperature.
This creates the fundamental problem with thick steaks on a grill. If you cook a 2-inch ribeye over 600°F direct heat the entire time, the outer half-inch will be well past well-done before the center reaches medium-rare. That overcooked gray band — the bane of every steak lover — is a direct consequence of the heat gradient that high, constant temperature creates in thick meat.
The solution is straightforward once you understand the physics: separate the browning from the cooking. Use gentle, indirect heat to bring the interior up to temperature slowly and evenly, then apply intense direct heat for a short sear. This minimizes the temperature gradient and gives you edge-to-edge even doneness with a properly developed crust.
The Best Cuts for Thick Grilling
Not every cut benefits equally from being cut thick. The best candidates share two qualities: enough intramuscular fat to stay juicy during the longer cook time, and enough structural integrity to hold up on the grill.
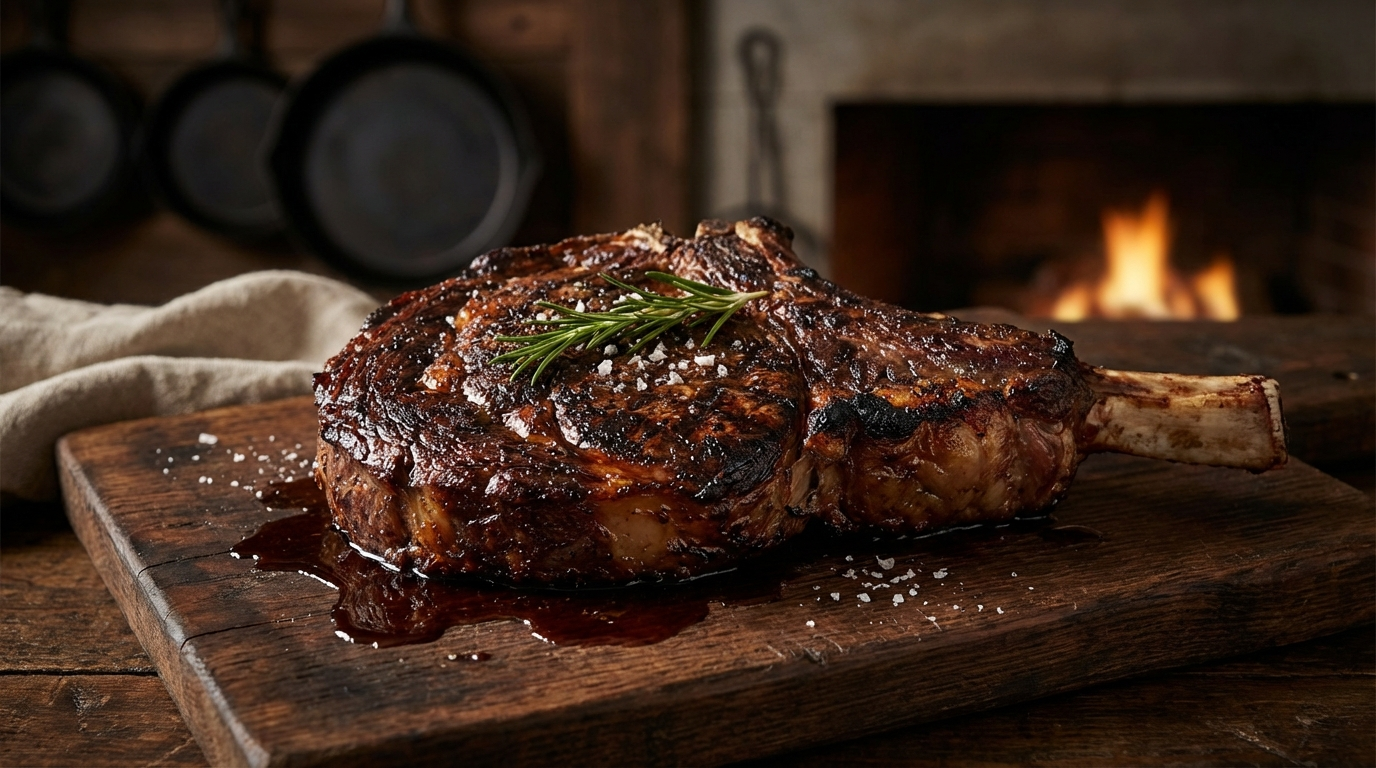
- Bone-in ribeye (cowboy steak): The gold standard for thick grilling. Cut 1.5 to 2 inches thick, the bone acts as a heat shield on one side, promoting more even cooking. Generous marbling keeps it moist through the extended cook.
- Porterhouse / T-bone: Two steaks in one — the strip and the tenderloin separated by a T-shaped bone. Cut thick (at least 1.5 inches) to qualify as a true porterhouse. The bone complicates cooking since the tenderloin cooks faster than the strip, but positioning the tenderloin away from direct heat solves this.
- Filet mignon: Naturally thick (2 to 3 inches) but lean. It benefits enormously from the indirect-then-sear approach because the lack of fat means it dries out fast under sustained high heat.
- Strip steak (New York strip): Excellent at 1.5 inches. The fat cap along one edge renders beautifully with extended cook time, and the moderate marbling keeps it juicy.
- Tomahawk: Essentially a bone-in ribeye with an extended rib bone left attached. The long bone makes a dramatic presentation and provides a convenient handle. Cook it exactly like a thick bone-in ribeye.
Preparation: What to Do Before the Grill
Dry Brining (12-24 Hours Ahead)
Salt your thick steaks at least 12 hours before grilling — ideally 24 hours. Use 3/4 teaspoon of kosher salt per pound. Place the salted steaks uncovered on a wire rack over a sheet pan in the refrigerator.
Here is what happens during that time. The salt initially draws moisture to the surface through osmosis. Within 30-40 minutes, that moisture dissolves the salt into a concentrated brine. Over the next several hours, that brine is reabsorbed deep into the meat through diffusion. The salt denatures some of the muscle proteins, loosening their structure and allowing them to retain more moisture during cooking.
The uncovered refrigerator rest also dries the surface. A dry surface is essential for browning — water on the surface must evaporate before the Maillard reaction can begin, and evaporation absorbs heat that should be going into crust formation.
Tempering: Let It Warm Up
Pull the steak from the refrigerator 45-60 minutes before grilling. For a 2-inch steak, this raises the internal temperature from roughly 38°F to about 50-55°F. That 15-degree head start matters — it reduces the total time on the grill by 10-15%, which means less time for the exterior to overcook while the center catches up.
Some people argue tempering does not matter. For thin steaks, they are mostly right — the difference is marginal. For thick steaks, the math changes enough to be worth the effort.
The Reverse Sear Method on a Grill
The reverse sear is the single best method for thick steaks on a grill. It works on any grill — charcoal, gas, or pellet — and it is nearly foolproof once you understand the setup.
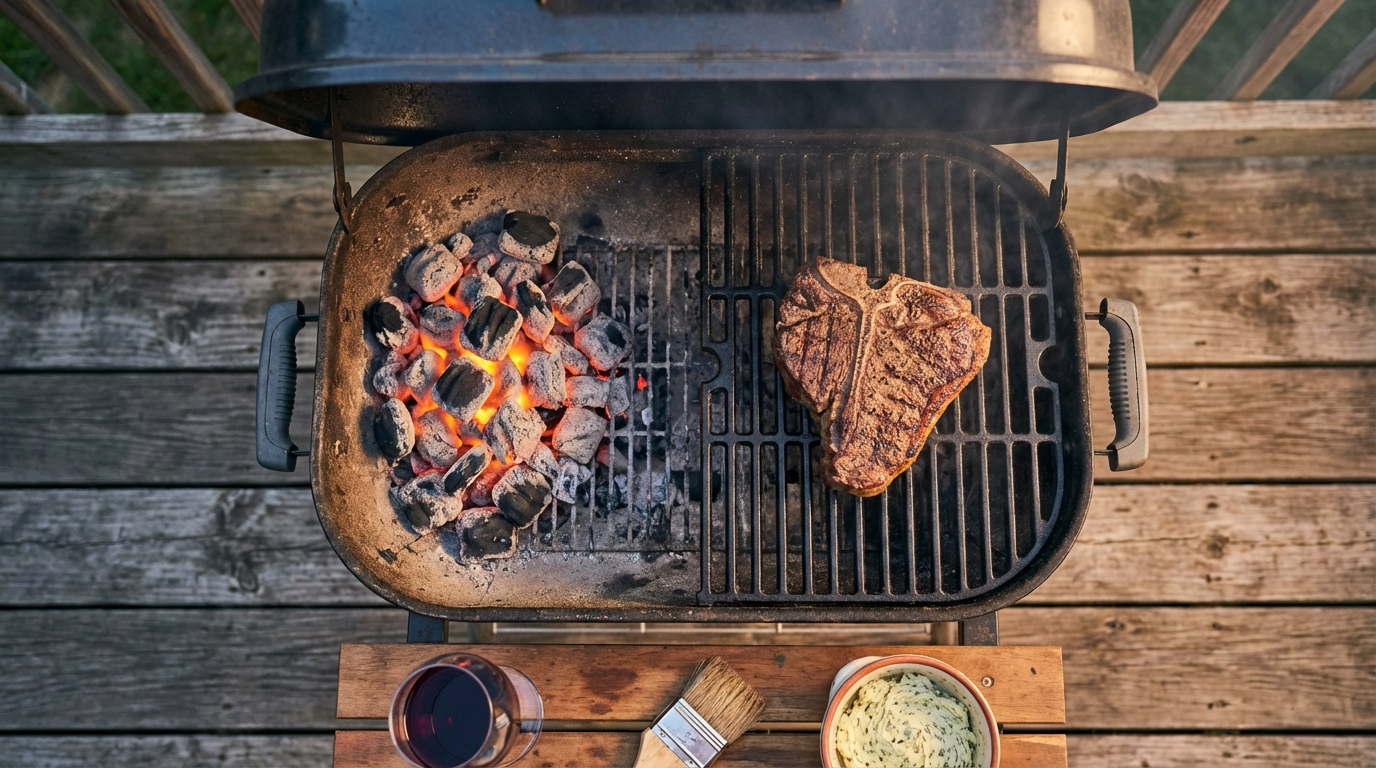
Step 1: Set Up Two Zones
You need a hot side and a cool side. On a charcoal grill, bank all the coals to one half. On a gas grill, light one or two burners and leave the others off. Target 225-275°F on the indirect (cool) side — measured at grate level, not the dome thermometer.
If you have not read our two-zone grilling guide, that covers the full setup in detail.
Step 2: Cook Indirect First
Place the steak on the cool side of the grill, close the lid, and let it cook with indirect heat. For a 2-inch steak at 250°F indirect, expect roughly:
- Rare (pull at 105°F): 25-35 minutes
- Medium-rare (pull at 115°F): 35-45 minutes
- Medium (pull at 125°F): 45-55 minutes
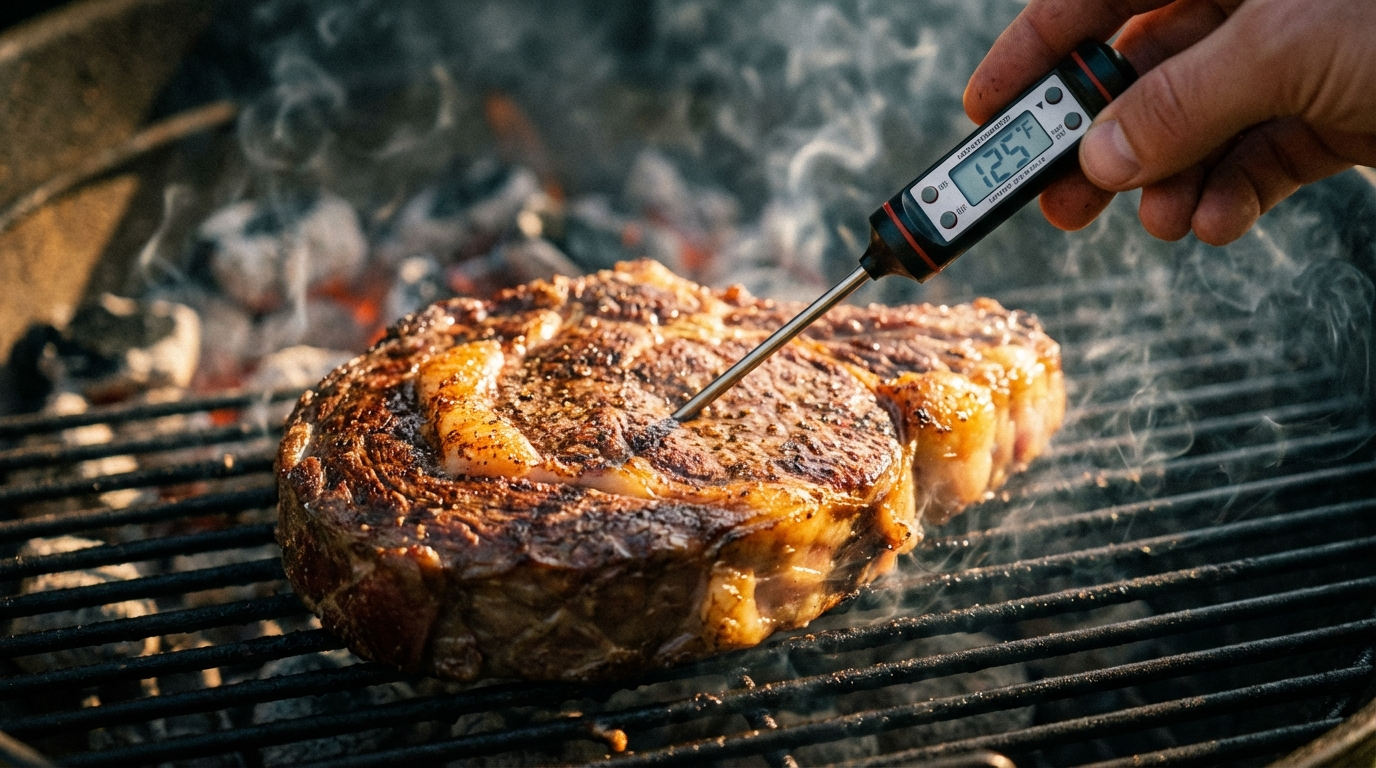
These are pull temperatures for the indirect phase — not your final target. You are pulling 10-15°F below your desired final temperature because the sear will add heat, plus carryover cooking will raise the temperature another 3-5°F during the rest.
Check the temperature every 10 minutes starting at the 20-minute mark. An instant-read thermometer inserted into the geometric center of the steak is the only reliable way to track progress.
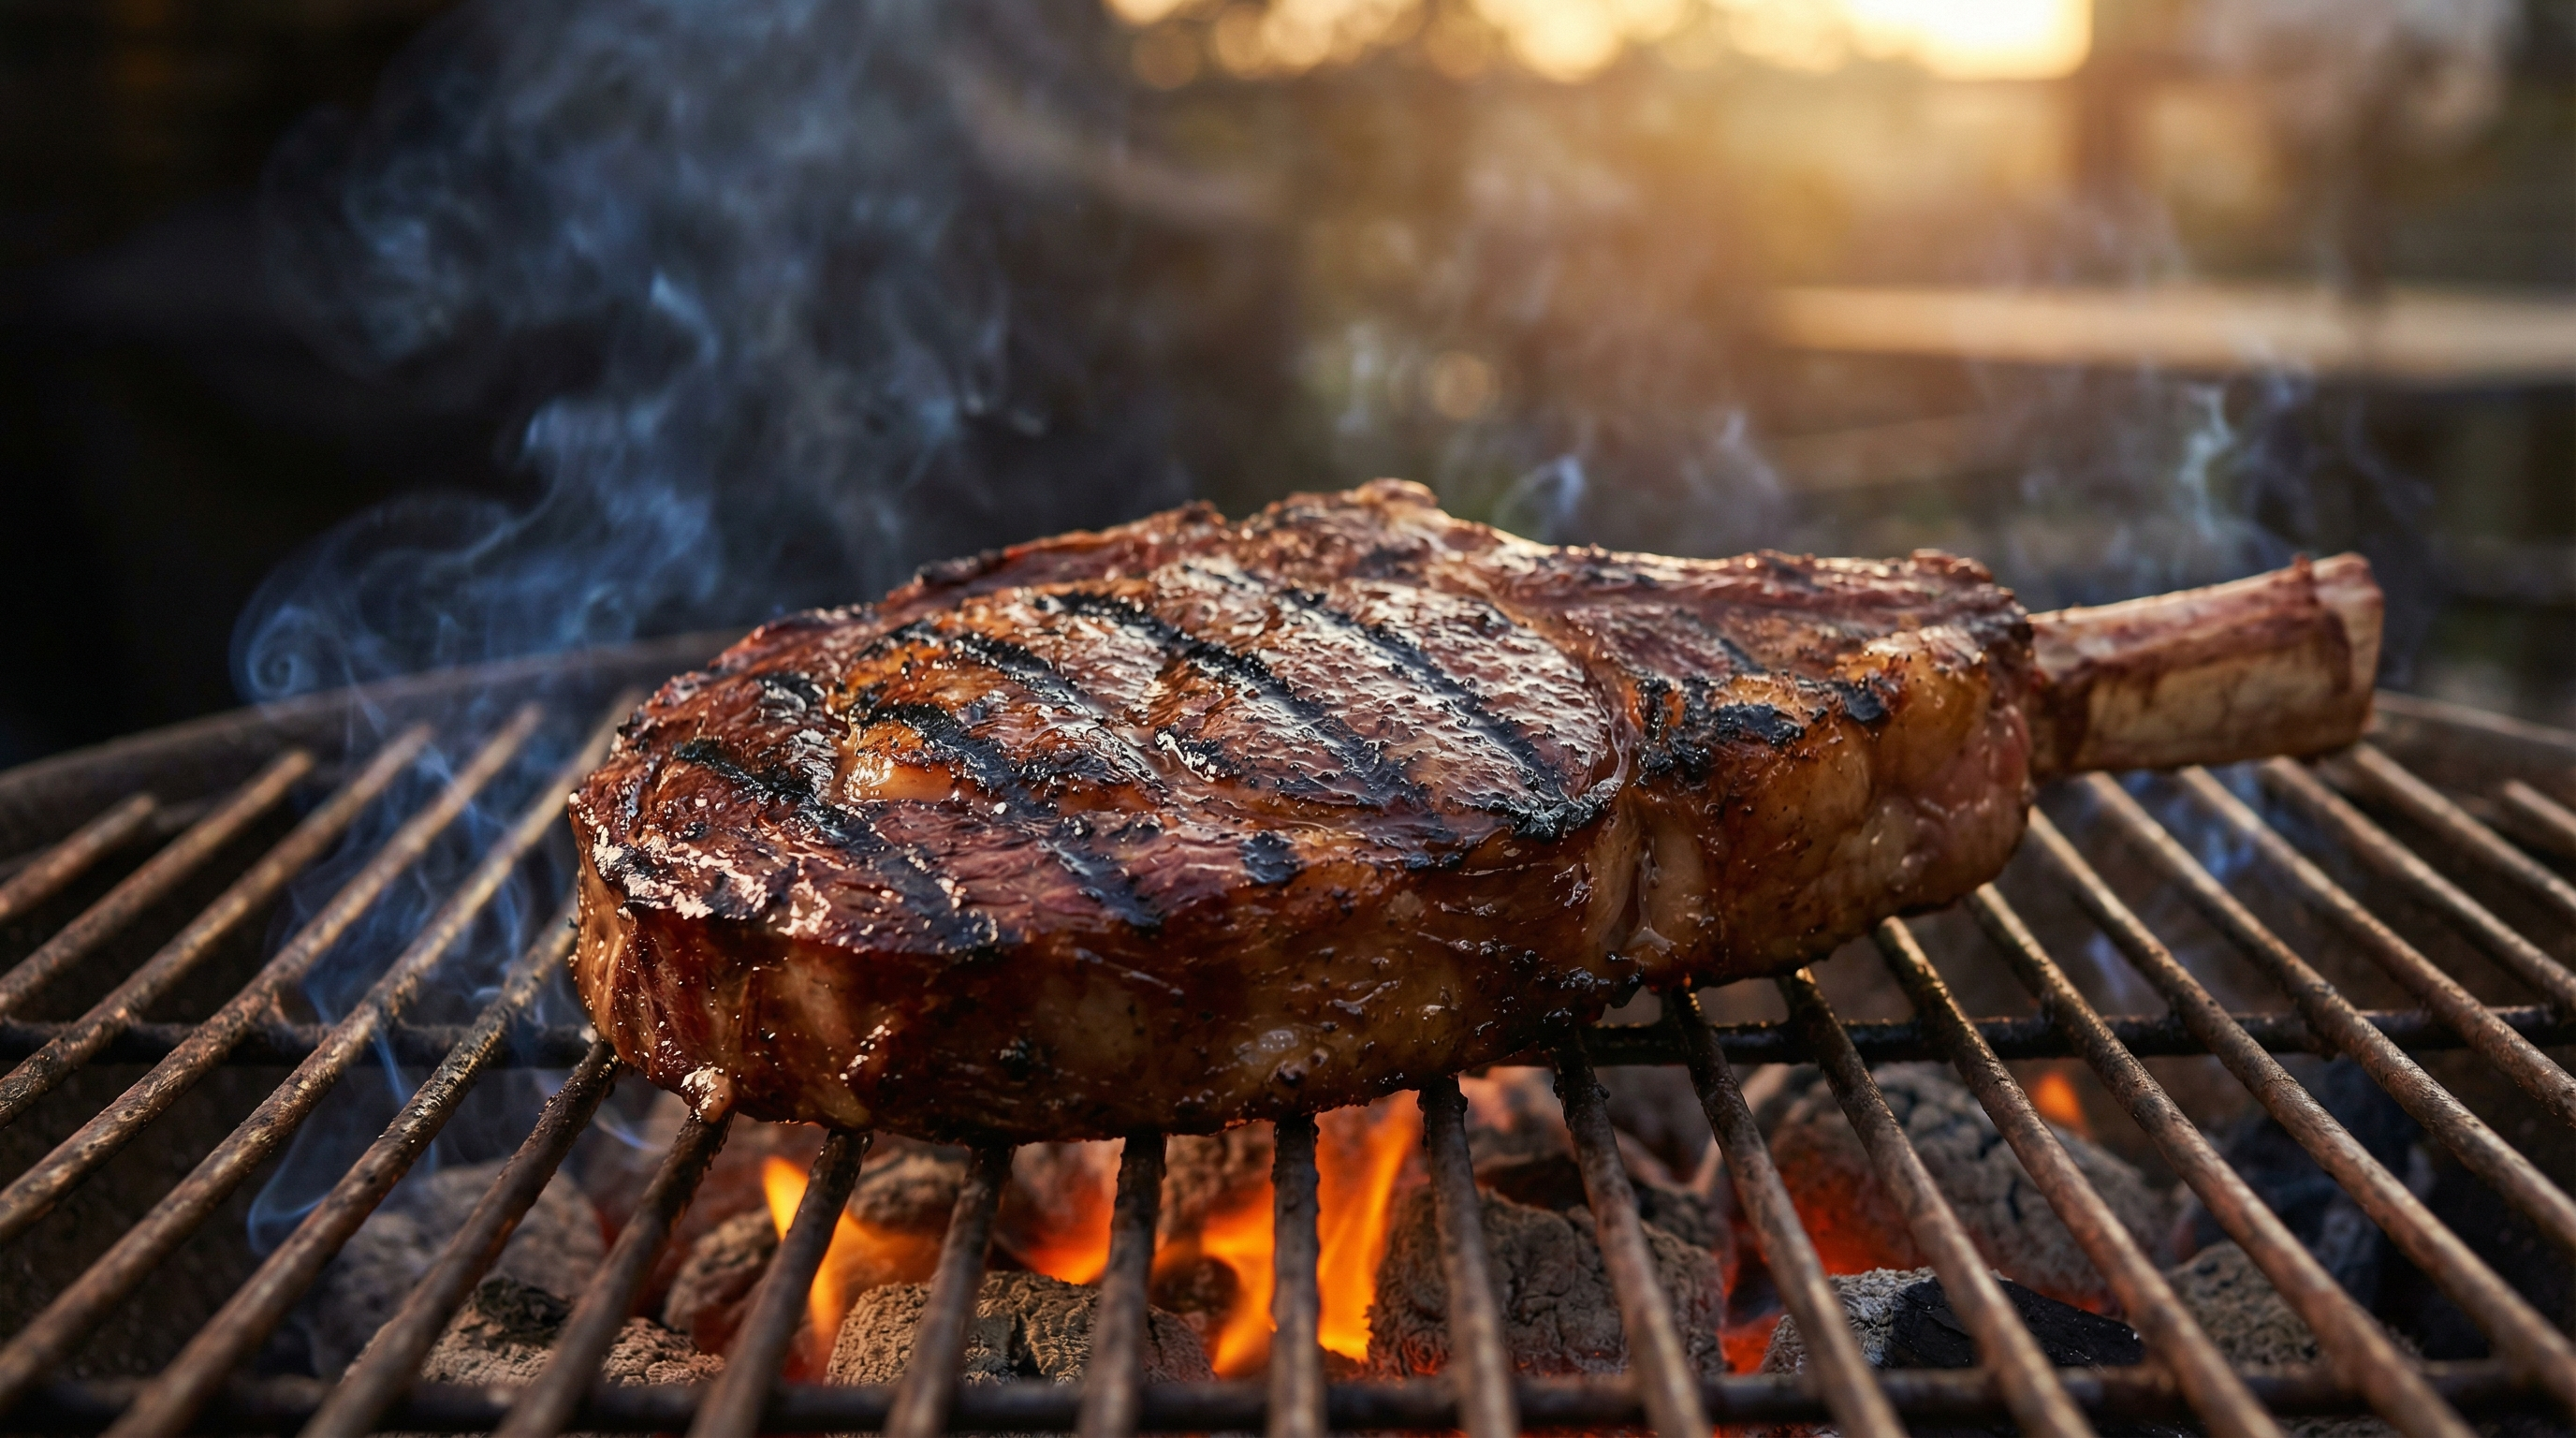
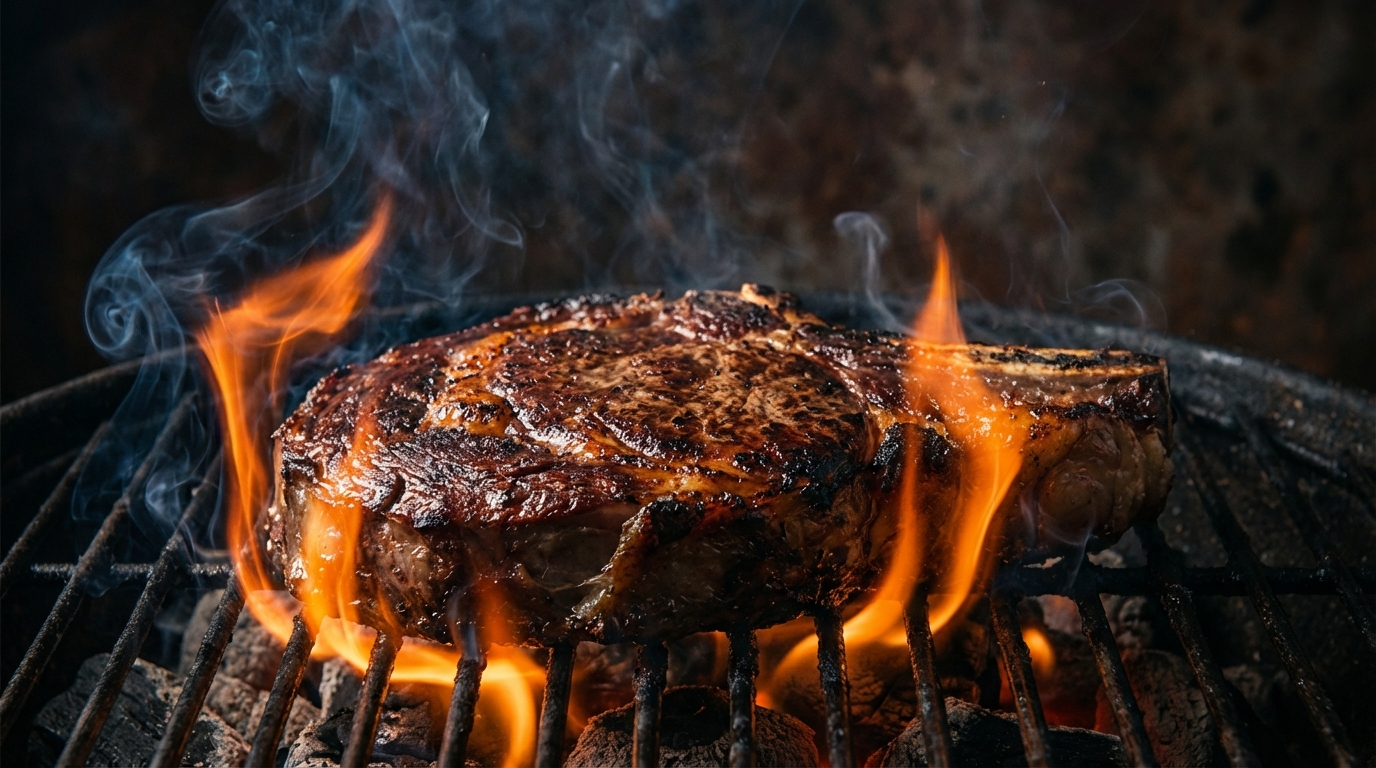
Step 3: Sear Over Direct Heat
Once the steak hits your pull temperature, move it directly over the hot coals or burners. Sear for 60-90 seconds per side. You want intense, aggressive heat — this is where the crust forms.
Do not move the steak during the sear. Let it sit, develop the crust, and flip once. If you want to sear the edges (recommended for fatty cuts like ribeye), hold the steak on its side with tongs for 15-20 seconds per edge.
The reason this works: by the time you sear, the interior is already at temperature. The sear only needs to penetrate the outer few millimeters — which happens fast at 600°F+. There is no time for a thick gray band to form.
Step 4: Rest the Steak
Transfer the steak to a cutting board and let it rest for 8-10 minutes. During the rest, the temperature gradient between the hot exterior and the warm interior equilibrates. The outer fibers, which contracted during the sear, relax and reabsorb some of the moisture they squeezed out.
For thick steaks, the rest is more important than for thin ones. The larger temperature differential between the exterior and interior means more moisture redistribution happens during the rest. Skip it and you will see a flood of juice on your cutting board that should have stayed in the meat.
Temperature Guide for Thick Steaks
These are final resting temperatures — what the steak should read after the full rest:
- Rare: 120-125°F — cool red center, soft texture
- Medium-rare: 130-135°F — warm red center, ideal for most thick cuts
- Medium: 140-145°F — warm pink center, good for fattier cuts where more fat rendering is desirable
- Medium-well: 150-155°F — slight pink, significant moisture loss begins here
For bone-in cuts, always measure temperature in the thickest part of the meat, away from the bone. Bone conducts heat differently than meat and will give you a misleading reading if you measure too close to it.
A general recommendation for thick, well-marbled cuts like ribeye: aim for medium-rare to medium (130-145°F). The extra fat needs some heat to render and become silky rather than chewy. Lean cuts like filet are best at rare to medium-rare (120-135°F) since they do not have fat to render.
Common Mistakes With Thick Steaks
Using Only Direct Heat
This is the number one mistake. Grilling a 2-inch steak entirely over direct heat is a losing battle against thermodynamics. By the time the center reaches medium-rare, the outer 1/4 inch is well-done. Always use a two-zone approach for steaks over 1.25 inches.
Not Using a Thermometer
The finger-poke test, timing charts, and "intuition" are unreliable for thick steaks. There are too many variables — grill temperature fluctuations, ambient temperature, bone presence, fat distribution, starting temperature. A $15 instant-read thermometer eliminates all the guesswork. Use one.
Cutting Too Early
The thicker the steak, the more patience you need. Cutting a thick steak after 2 minutes of rest means slicing into a piece of meat where the center is 120°F and the exterior is 180°F+. That gradient pushes moisture outward, and cutting gives it an escape route. Wait the full 8-10 minutes.
Skipping the Dry Brine
On a thin steak, the difference between a salted and unsalted surface is noticeable but not dramatic. On a thick steak, the dry brine affects seasoning depth (salt penetrates further), moisture retention (denatured proteins hold more water), and crust formation (drier surface browns faster). The impact compounds with thickness.
Charcoal vs. Gas for Thick Steaks
Both work. But they have different strengths.
Charcoal gets hotter — a chimney of lump charcoal banked to one side can produce 700°F+ direct heat for the sear phase. It also adds a subtle smoke flavor during the indirect phase. The downside is less precise temperature control on the indirect side, though vent management gets you close enough.
Gas gives you precise control over the indirect zone temperature, which makes the slow-cook phase more predictable. The sear phase is adequate on most gas grills but rarely matches the intensity of charcoal. A cast iron grate or a sear burner helps close the gap.
If you are buying a grill specifically for thick steaks, charcoal wins on sear quality. If you already have gas, you will get excellent results — the technique matters far more than the fuel source.
Bone-In vs. Boneless: Does It Matter?
Bone is a poor heat conductor compared to meat. It insulates the meat adjacent to it, which means the area near the bone cooks slower than the rest. For thick steaks, this is actually an advantage — it creates a natural temperature buffer that helps prevent overcooking near the bone.
The practical impact: bone-in thick steaks are more forgiving. If you overshoot the sear by 30 seconds, the bone-adjacent meat stays at a lower temperature than the rest, giving you a safety margin. Boneless thick steaks are more uniform but less forgiving of timing errors.
The flavor difference is debatable. Blind taste tests have failed to consistently demonstrate that bone-in tastes better than boneless when cooked to the same internal temperature. The real advantage is structural — the bone helps the steak hold its shape and provides insulation.
Frequently Asked Questions
How long does it take to grill a 2-inch thick steak?
Using the reverse sear method, expect 35-45 minutes on the indirect side (at 250°F) to reach medium-rare pull temperature, plus 2-3 minutes of direct searing, plus 8-10 minutes of rest. Total time from grill to plate is roughly 50-60 minutes for a 2-inch steak to medium-rare.
What temperature should I grill a thick steak at?
Use two temperatures: 225-275°F for the indirect cooking phase and 600°F+ for the direct sear. The indirect phase brings the center up to temperature slowly, and the high-heat sear creates the crust. Do not try to use one temperature for both.
Should I close the grill lid when cooking thick steaks?
Yes — during the indirect phase, close the lid to create convection heat that cooks the steak evenly. During the sear phase, you can leave the lid open since you want maximum radiant heat on the surface, not convection.
Do I need to flip a thick steak more than once?
During the indirect phase, no flipping is needed — convection heat cooks from all sides. During the sear, flip once after 60-90 seconds. One flip per side is all you need for a proper crust.
Can I grill a frozen thick steak?
You can, but the results are inconsistent with thick cuts. The frozen center creates an extreme temperature gradient that even the reverse sear struggles to overcome. Thaw thick steaks fully in the refrigerator (24-48 hours for a 2-inch cut) for the best results.
Why is my thick steak gray on the outside but raw in the middle?
You used direct heat only. The exterior reached well-done temperatures long before the center warmed up. Switch to the reverse sear method: cook with indirect heat first to bring the center up to temperature, then sear for the crust. This eliminates the gray band problem.
More Expert Guides
Steak Doneness Temperature Guide: The Science of Every Level from Rare to Well Done
Every degree matters. This science-backed guide covers the exact internal temperatures for every steak doneness level, why each temperature produces a different texture, and how to nail your target every time.
14 min readDirect vs Indirect Heat Grilling: The Science of Two-Zone Cooking
Direct heat sears. Indirect heat roasts. Understanding the physics of each — and when to combine them — is the foundation of every great grilling technique.
14 min readResting Meat After Cooking: The Science of Why It Makes Every Steak Juicier
Resting meat after cooking is not optional — it is physics. Here is exactly what happens inside the steak during those crucial minutes and how long to rest every cut.