How to Light Charcoal: The Science of Every Method Ranked
How to Light Charcoal: The Science of Every Method Ranked
Every charcoal grilling session starts with the same problem: turning inert carbon into a controlled fire. How you solve that problem determines when you start cooking, how clean your fire burns, and whether your food tastes like smoke or lighter fluid.
Most grilling guides treat charcoal lighting as a footnote — "light your coals and wait." But the ignition method affects combustion chemistry, ash production, and temperature stability for the entire cook. Here's what actually happens during each method, and why it matters.
What Happens When Charcoal Ignites
Charcoal — whether lump or briquettes — is primarily carbon with small amounts of volatile compounds, minerals, and (in briquettes) binders like starch and limestone. Ignition occurs in three phases:
Phase 1: Heating (ambient to 500°F). The charcoal absorbs thermal energy from the ignition source. Moisture evaporates first (even "dry" charcoal contains 2–5% moisture). Then volatile organic compounds begin to off-gas — these are the wisps of white smoke you see early in the process.
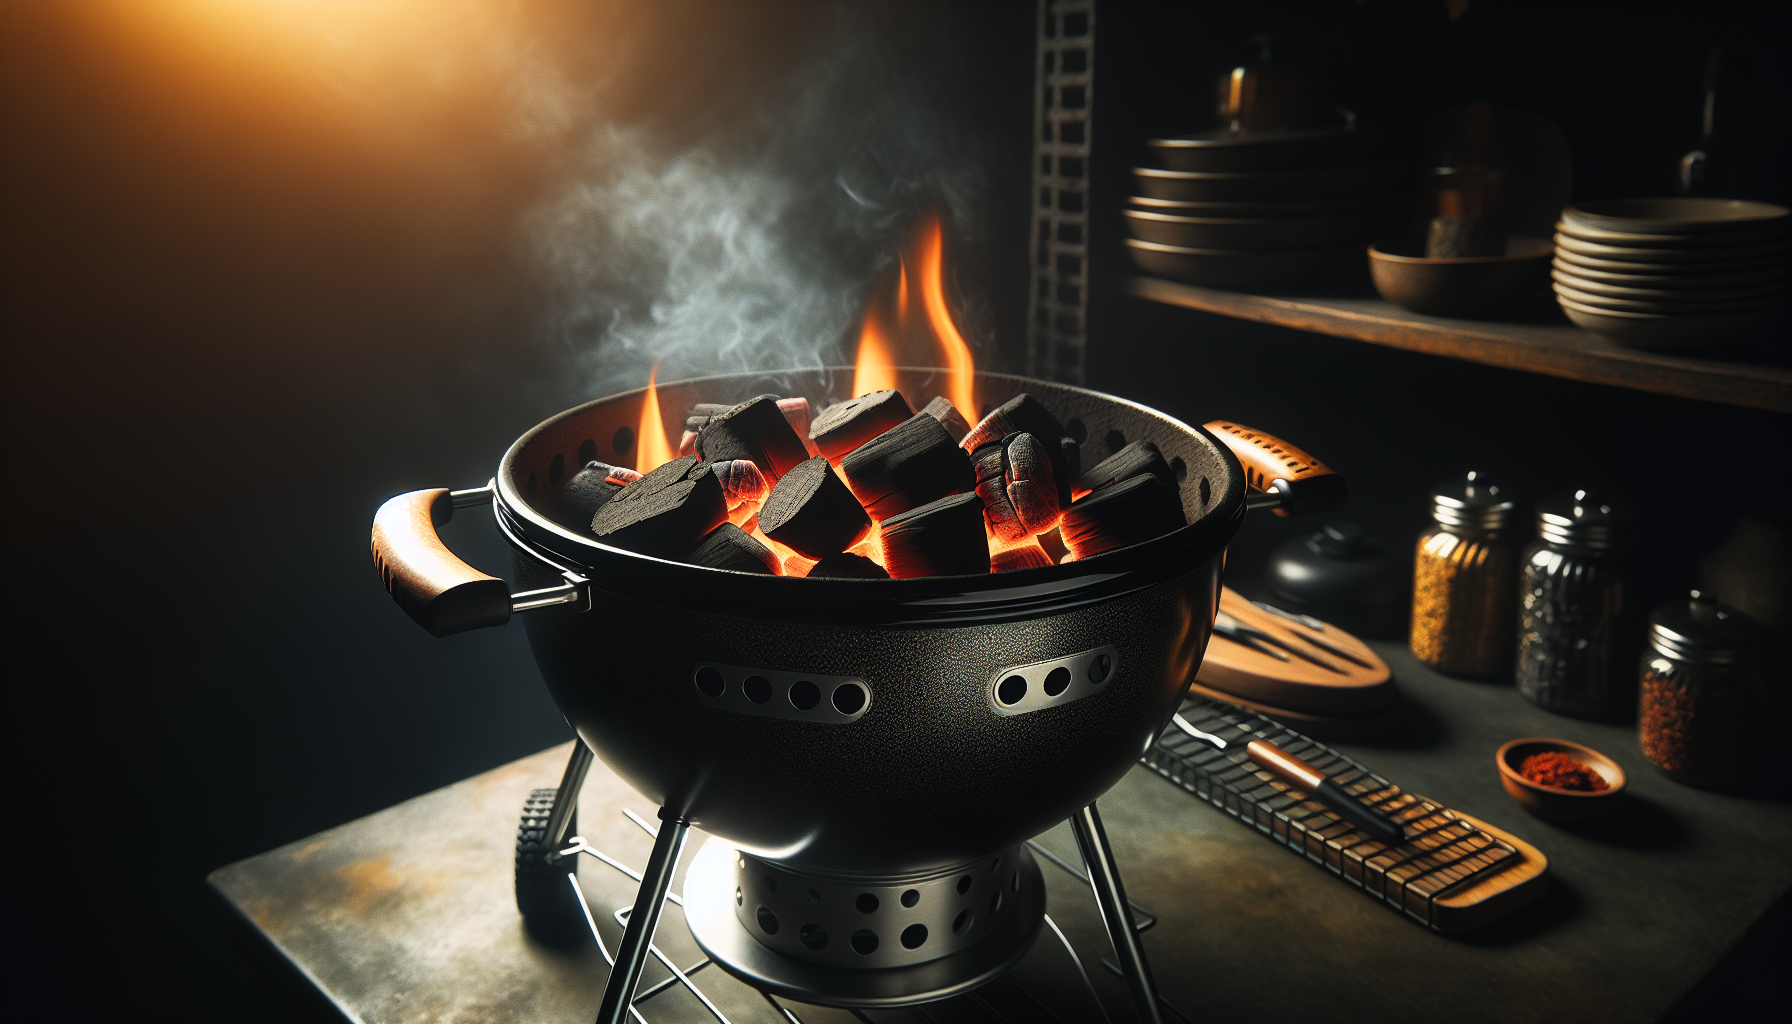
Phase 2: Volatile combustion (500–700°F). The off-gassed volatiles catch fire, producing visible flames. This is the flaming stage — the charcoal looks like it's on fire, but most of what's burning is the gas coming off the surface, not the solid carbon itself. This phase produces the most smoke and the most off-flavors if you cook during it.
Phase 3: Glowing combustion (700°F+). The volatiles have burned off. Now the solid carbon itself is reacting with oxygen — this is the glowing, ashy stage. The charcoal is covered in gray ash on the outside while glowing orange underneath. Combustion is cleaner, hotter, and produces far less smoke. This is when you want to cook.
The goal of every lighting method is to get all your charcoal to Phase 3 as quickly and uniformly as possible.
Method 1: Chimney Starter (The Gold Standard)
A chimney starter is a sheet-metal cylinder with a grate inside and ventilation holes. You fill the top with charcoal, stuff crumpled newspaper or a fire starter cube underneath, and light the bottom. The chimney effect does the rest.
The Physics
The chimney starter exploits the stack effect — hot air rises, creating a natural updraft. As the newspaper burns at the bottom, it heats the lowest layer of charcoal. Hot combustion gases rise through the column of charcoal above, pre-heating each piece as they pass. Fresh air is drawn in through the bottom ventilation holes, feeding the fire with oxygen.
This creates a self-reinforcing cycle: more heat → more updraft → more oxygen → more heat. The charcoal lights from bottom to top in a propagating wave. Within 15–20 minutes, the entire column is at Phase 3 — glowing orange with gray ash.
Performance
- Time to cooking-ready: 15–20 minutes
- Temperature uniformity: Excellent — all coals reach the same stage simultaneously
- Flavor impact: None — no chemical accelerants
- Ash production: Normal
- Cost: $15–25 for the chimney (one-time purchase)
Tips for Best Results
- Use two sheets of crumpled newspaper or one paraffin fire starter cube. Newspaper is sufficient and free.
- Don't overfill — leave about 1 inch of space at the top for airflow.
- Place the chimney on a heat-safe surface (the grill's charcoal grate works perfectly).
- Coals are ready when the top layer is covered in gray ash and you can see orange glow through the ventilation holes.
- Pour carefully — wear heat-resistant gloves. The chimney handle gets hot.
Verdict: The chimney starter is the best all-around method. It's fast, produces no off-flavors, creates uniform heat, and costs almost nothing. If you own a charcoal grill and don't own a chimney starter, fix that today.
Method 2: Electric Charcoal Starter
An electric starter is a heating element (essentially a large, exposed coil like an electric stove burner) that you bury in the charcoal and plug in. The coil heats to 1,000°F+, igniting the charcoal through direct contact.
The Physics
The electric element transfers heat to charcoal through conduction (direct contact) and radiation (infrared from the glowing coil). Unlike the chimney starter, there's no stack effect — the coals around the element light first, and ignition spreads outward through coal-to-coal heat transfer.
This radial spread is slower than the chimney's vertical propagation because there's no forced airflow driving the process. The coals nearest the element may reach Phase 3 while outer coals are still in Phase 1.
Performance
- Time to cooking-ready: 20–30 minutes (slower than chimney)
- Temperature uniformity: Moderate — center lights before edges
- Flavor impact: None
- Ash production: Normal
- Cost: $15–30
Pros and Cons
Pros: No consumables needed (no newspaper, no starter cubes). Completely clean burning. Good for people with limited dexterity who find chimney starters awkward to handle.
Cons: Requires an electrical outlet near the grill. Slower ignition spread. You need to remove the element before it melts (most have no auto-shutoff). The element is fragile and can break.
Verdict: A solid, chemical-free option if you have power nearby. Slightly slower and less uniform than a chimney starter, but produces clean results.
Method 3: Fire Starter Cubes and Wax Starters
Paraffin wax cubes, compressed wood fiber starters (like Weber Lighter Cubes), or natural fire starters made from sawdust and wax. You place them among the charcoal, light them, and they burn for 8–12 minutes — long enough to ignite surrounding coals.
The Chemistry
Paraffin wax is a long-chain hydrocarbon (C25H52 and similar). It burns cleanly into CO2 and H2O with minimal residue. Wood fiber starters combine cellulose with wax — the cellulose provides structure and initial ignition, the wax provides sustained burn time.
When used inside a chimney starter, fire starter cubes are the ideal ignition source — cleaner than newspaper and more reliable in wind. When used alone (without a chimney), they work but produce less uniform results because there's no stack effect concentrating the heat.
Performance (Without Chimney)
- Time to cooking-ready: 25–35 minutes
- Temperature uniformity: Poor to moderate — coals near the cube light first, edges lag
- Flavor impact: Negligible with paraffin; none with natural wood/wax starters
- Ash production: Normal
- Cost: $0.25–0.50 per cube
Verdict: Best used as the ignition source inside a chimney starter. On their own, they work but are slower and less uniform. Natural/wax starters are far superior to lighter fluid for direct-in-grill lighting.
Method 4: Lighter Fluid (Not Recommended)
Lighter fluid is a petroleum distillate — typically naphtha or a similar volatile hydrocarbon. You squirt it on the charcoal, wait 30 seconds for it to soak in, and light it. The fluid ignites and its flame transfers to the charcoal.
The Chemistry Problem
Here's why lighter fluid is the worst option from a science perspective: petroleum distillates don't burn completely clean, especially at the relatively low temperatures of an initial charcoal fire. Incomplete combustion produces polycyclic aromatic hydrocarbons (PAHs), volatile organic compounds (VOCs), and various partially oxidized hydrocarbons — some of which have detectable flavors and odors.
These compounds deposit on food. Gas chromatography studies have detected petroleum-derived residues on meat cooked over lighter-fluid-lit charcoal, even when cooks waited the recommended time before adding food. The residues are most concentrated when food is added too early (before all fluid has burned off), but trace amounts persist even with proper waiting.
The "let it burn off" advice is partly true — most of the fluid does combust. But the combustion products themselves aren't all flavor-neutral. You're adding a chemical signature to your cook that doesn't exist with other methods.
Performance
- Time to cooking-ready: 25–35 minutes (you must wait for fluid to burn off completely)
- Temperature uniformity: Poor — fluid ignites surface coals unevenly
- Flavor impact: Detectable in blind taste tests, especially on delicate foods
- Ash production: Normal
- Cost: $5–8 per bottle
Safety Concerns
Lighter fluid is also a safety hazard. The most common grilling injury involves adding lighter fluid to already-hot coals — the fluid can flash back along the stream to the bottle. Never add lighter fluid to lit or hot coals. The fluid is also toxic if ingested and flammable during storage.
Verdict: There is no scenario where lighter fluid is the best option. A chimney starter is faster, cleaner, cheaper per use, and produces better food. Lighter fluid exists because it's convenient for people who don't know better. Now you know better.
Method 5: The Minion Method (For Low-and-Slow)
The Minion method isn't about lighting all your charcoal — it's about lighting a small amount and letting it slowly ignite the rest over many hours. Named after BBQ enthusiast Jim Minion, it's the standard technique for long smokes (brisket, pork shoulder, ribs).
How It Works
Fill your grill or smoker with unlit charcoal. Light 10–20 briquettes in a chimney starter until they're fully ashed over. Pour the lit coals on top of (or in the center of) the unlit coals. Close the lid and set your vents to your target temperature.
The lit coals slowly ignite adjacent unlit coals, creating a slow-burning chain reaction that can sustain cooking temperatures (225–275°F) for 8–16 hours depending on your cooker and the amount of charcoal.
The Thermodynamics
The Minion method works because the rate of combustion is controlled by oxygen supply (vent settings), not by the amount of lit charcoal. A small number of burning coals consuming oxygen at a restricted rate produces steady, low heat. As each coal burns out, the next one in the chain ignites and takes over.
This is fundamentally different from lighting all coals at once (which produces maximum heat that decays over time). The Minion method produces a relatively flat temperature curve — a slow ramp up, a long plateau, and a gradual decline.
Performance
- Time to cooking-ready: 15–20 minutes (to light the starter coals)
- Temperature stability: Excellent for low-and-slow (225–275°F for 8+ hours)
- Flavor impact: Some debate — critics argue unlit coals produce more smoke as they ignite. In practice, the effect is minimal with quality briquettes.
- Best for: Long cooks in kamado-style cookers, Weber Smokey Mountains, and kettle grills set up for indirect cooking
Verdict: Essential technique for low-and-slow barbecue. Not suitable for high-heat grilling — that requires all coals lit simultaneously.
Lump Charcoal vs. Briquettes: Lighting Differences
The choice between lump charcoal and briquettes affects your lighting approach:
Lump charcoal lights faster (irregular shapes create more air gaps for oxygen flow) but burns less uniformly. Pieces vary wildly in size — small pieces ignite in 5 minutes while large chunks take 15+. In a chimney starter, lump is ready 3–5 minutes sooner than briquettes.
Briquettes are uniform in size and density, so they light at a consistent rate. The binders (starch, limestone) require slightly more energy to ignite but produce a more predictable, even fire. Briquettes also produce more ash due to their mineral content.
For high-heat searing, lump charcoal burns hotter (up to 1,200°F vs. 900°F for briquettes) and responds faster to airflow changes. For long, steady cooks, briquettes' consistency makes temperature management easier.
Troubleshooting Common Problems
Charcoal Won't Stay Lit
Almost always an airflow problem. Charcoal needs oxygen to burn. Check that your vents are open (both bottom intake and top exhaust). If using a chimney starter, make sure the bottom ventilation holes aren't blocked. Old, damp charcoal absorbs moisture from humid air — store charcoal in a sealed container or bag.
Takes Too Long to Light
If your chimney starter takes more than 25 minutes, the newspaper may be too loosely crumpled (burns too fast without transferring enough heat) or the charcoal is damp. Use 2 sheets of tightly crumpled newspaper or a paraffin cube. For damp charcoal, spread it in the sun for 30 minutes before loading the chimney.
Charcoal Burns Too Hot, Then Dies Quickly
This happens when too much charcoal is fully lit at once in an open grill with all vents wide open. The oxygen-rich environment causes rapid combustion, burning through fuel fast. Close the lid and restrict the intake vent to 25–50% open. The reduced oxygen slows combustion and extends burn time.
Uneven Heat Across the Grill
If one side of your charcoal bed is hotter than the other, the coals weren't spread evenly after pouring from the chimney. For two-zone grilling, bank all coals to one side deliberately. For even direct heat, spread coals in a single layer across the entire charcoal grate and wait 5 minutes for temperatures to stabilize.
How Much Charcoal to Use
The amount of charcoal depends on your cook:
- High-heat searing (450–600°F): Full chimney (roughly 80–100 briquettes or equivalent lump). Bank to one side for two-zone, or spread evenly for an all-direct setup.
- Medium-heat grilling (350–400°F): 3/4 chimney. Spread evenly or use two-zone.
- Low-and-slow smoking (225–275°F): Minion method — fill the firebox with unlit coals, light 15–20 briquettes in the chimney, and add on top.
- Quick sear only (post-sous-vide or reverse sear): Half chimney is sufficient — you only need 2–3 minutes of intense heat.
The Bottom Line
A chimney starter with newspaper or a wax fire cube is the objectively best way to light charcoal for 90% of grilling situations. It's fast, clean, cheap, and produces no off-flavors. The Minion method handles long cooks. Everything else is either slower, dirtier, or both.
Skip the lighter fluid. Your food — and anyone eating it — will thank you.
Frequently Asked Questions
What is the fastest way to light charcoal?
A chimney starter is the fastest reliable method — 15 to 20 minutes to fully ashed, cooking-ready coals. The stack effect creates natural airflow that accelerates ignition from bottom to top. No other method matches its speed and uniformity without chemical accelerants.
How long does it take for charcoal to be ready to cook on?
With a chimney starter: 15–20 minutes. With an electric starter: 20–30 minutes. With fire starter cubes alone: 25–35 minutes. With lighter fluid: 25–35 minutes (must wait for complete burn-off). Charcoal is ready when covered in gray ash with an orange glow underneath.
Does lighter fluid affect the taste of food?
Yes. Gas chromatography studies have detected petroleum-derived residues on food cooked over lighter-fluid-lit charcoal, even when cooks waited before adding food. The effect is most noticeable on delicate foods and in blind taste tests. A chimney starter eliminates this issue entirely.
How do you light charcoal without lighter fluid?
Use a chimney starter with crumpled newspaper or a paraffin fire starter cube underneath. Fill the chimney with charcoal, light the newspaper through the bottom holes, and wait 15–20 minutes. This is faster, cleaner, and produces better-tasting food than lighter fluid.
What is the Minion method for charcoal?
The Minion method involves filling your grill or smoker with unlit charcoal, then adding a small number of fully lit coals on top. The lit coals slowly ignite adjacent unlit coals over hours, maintaining steady low temperatures (225–275°F) for 8–16 hours. It is the standard technique for long barbecue cooks like brisket and pork shoulder.
How much charcoal do I need for grilling?
For high-heat searing (450–600°F): a full chimney (80–100 briquettes). For medium-heat grilling (350–400°F): 3/4 chimney. For low-and-slow smoking: use the Minion method with a full firebox of unlit coals plus 15–20 lit. For a quick sear after reverse sear or sous vide: half chimney.
More Expert Guides
Brisket Flat vs Point: Anatomy, Flavor Differences, and How to Cook Each Cut
A whole packer brisket contains two distinct muscles with radically different properties. Understanding the flat and the point — their fiber direction, fat distribution, and collagen content — is the difference between great barbecue and dried-out disappointment.
15 min readSteak Doneness Temperature Guide: The Science of Every Level from Rare to Well Done
Every degree matters. This science-backed guide covers the exact internal temperatures for every steak doneness level, why each temperature produces a different texture, and how to nail your target every time.
14 min readDirect vs Indirect Heat Grilling: The Science of Two-Zone Cooking
Direct heat sears. Indirect heat roasts. Understanding the physics of each — and when to combine them — is the foundation of every great grilling technique.