Sous Vide Steak Temperature Guide: Every Doneness, Every Cut
Sous Vide Steak Temperature Guide: Every Doneness, Every Cut
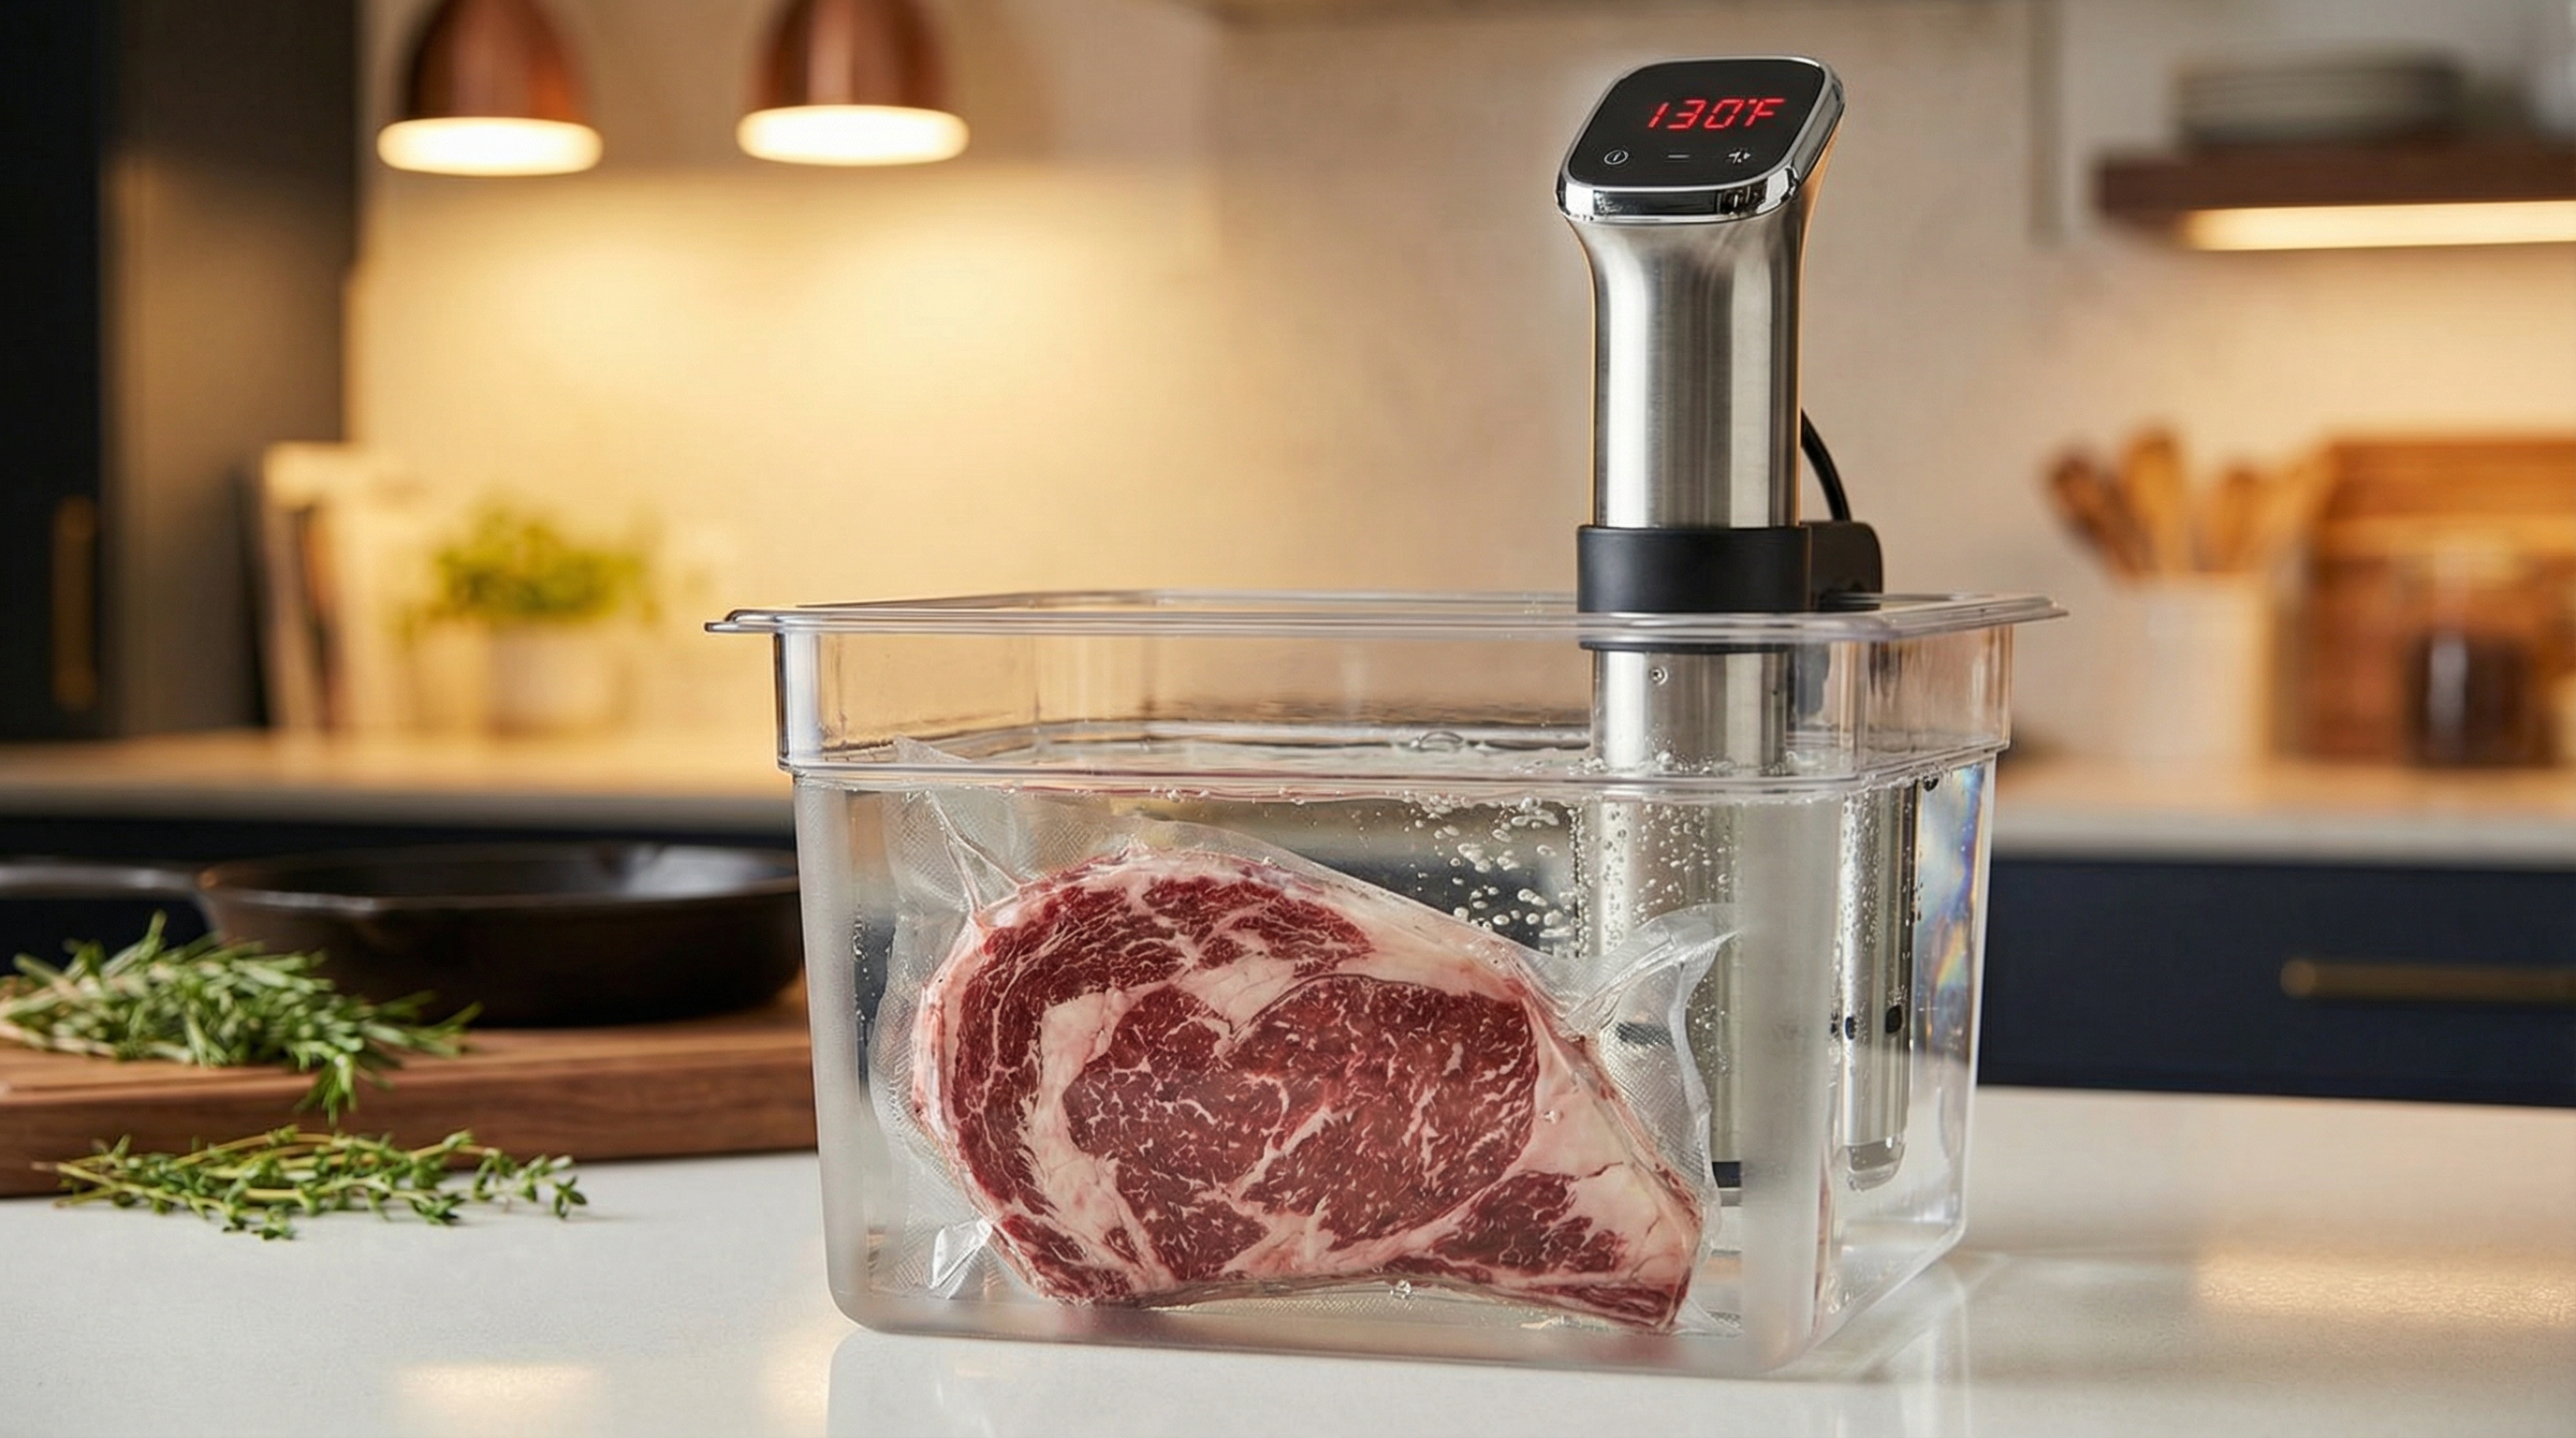
Sous vide cooking eliminates the single biggest variable in steak preparation: guesswork. By holding meat at a precise temperature in a water bath, you get edge-to-edge doneness that is physically impossible to achieve with any other cooking method.
But precision only works if you know what temperature to set. Too many guides give you a single number and call it a day. The reality is more nuanced — different cuts, different thicknesses, and different fat compositions all affect what temperature actually produces your ideal result.
This guide covers every doneness level, explains the science behind each temperature choice, and gives you the exact time windows for every common steak thickness.
Why Sous Vide Produces Better Steaks
When you grill or pan-sear a steak traditionally, you are applying heat far above your target temperature. A grill running at 500°F cooking a steak to a 130°F internal target creates a steep thermal gradient — the outside reaches 200°F+ while you wait for the center to catch up. The result is a gray band of overcooked meat surrounding the pink center.
Sous vide flips this approach. The water bath holds the exact temperature you want the finished steak to reach. Since the heat source never exceeds your target, it is thermodynamically impossible to overcook the interior. The steak equilibrates to the water temperature and stays there — whether you pull it at the minimum time or leave it an extra hour.
This is not about convenience or being lazy. It is about physics. A 130°F water bath will bring every molecule of protein in that steak to exactly 130°F. No gradients, no guessing, no "carry it 5 degrees early and hope." The precision changes your results fundamentally.
The Enzyme Advantage
There is another benefit most guides skip: enzymatic tenderization. Between 104°F and 122°F, naturally occurring enzymes called cathepsins are highly active. They break down structural proteins in the muscle fiber, making meat more tender. In traditional cooking, a steak blows through this temperature range in minutes. In sous vide, a thick steak might spend 30–60 minutes in this zone — giving the enzymes significantly more time to work.
This is why a sous vide steak cooked to the same final temperature as a traditionally cooked steak often tastes noticeably more tender. It is not placebo. The extended time in the enzyme-active range produces measurable structural changes in the myosin and actin filaments.
The Complete Sous Vide Steak Temperature Chart
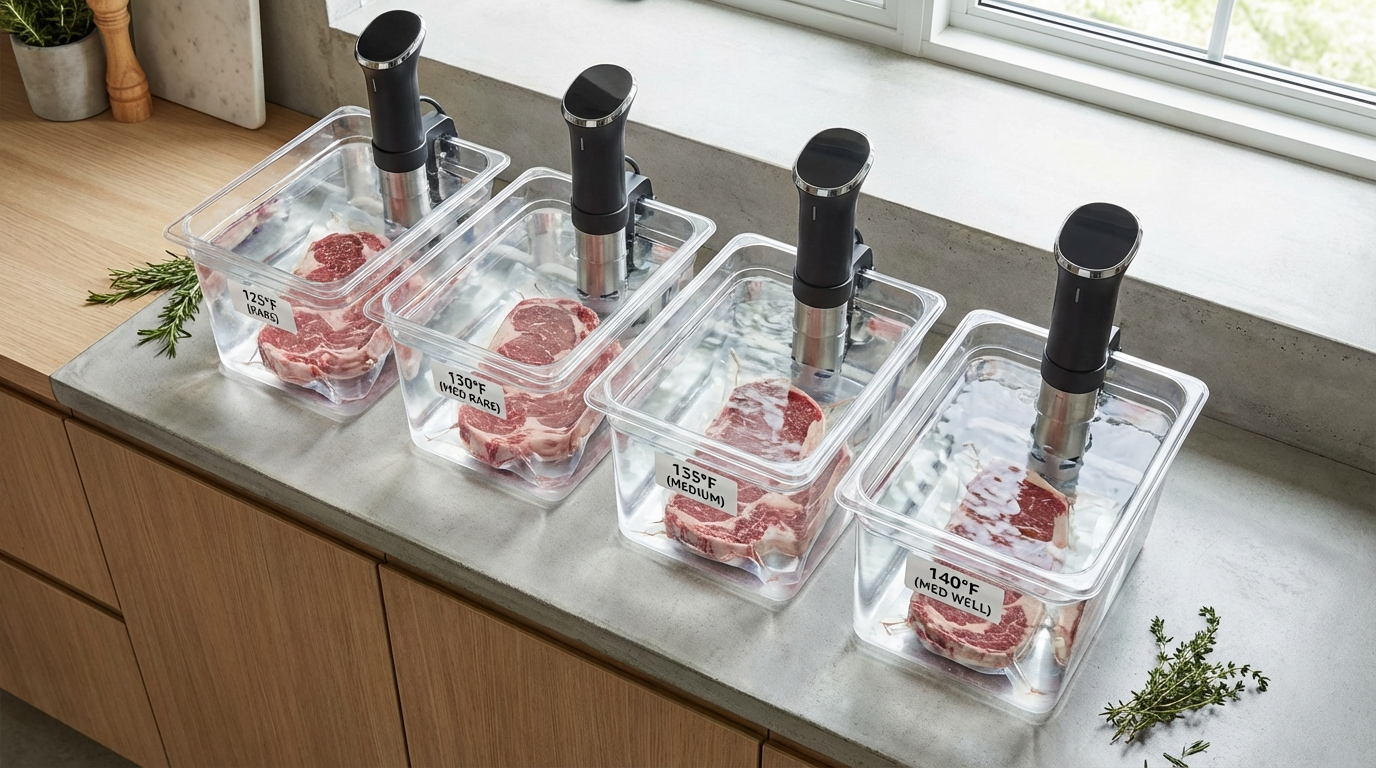
These temperatures represent the water bath setting — which equals the final internal temperature of the steak after equilibration.
Rare: 120°F–125°F (49°C–52°C)
At 120°F, myosin proteins have barely begun to denature. The steak is bright red throughout with a soft, almost raw-feeling texture in the center. The fat in well-marbled cuts has not started rendering, which means heavily marbled steaks like ribeye can feel slightly waxy at this temperature.
Best for: Filet mignon, tenderloin medallions, lean cuts where tenderness is already high.
Avoid for: Ribeye, strip steak with heavy fat caps — the intramuscular fat needs more heat to render.
Recommended temp: 125°F for most people who think they want rare. True 120°F is more aggressive than most expect.
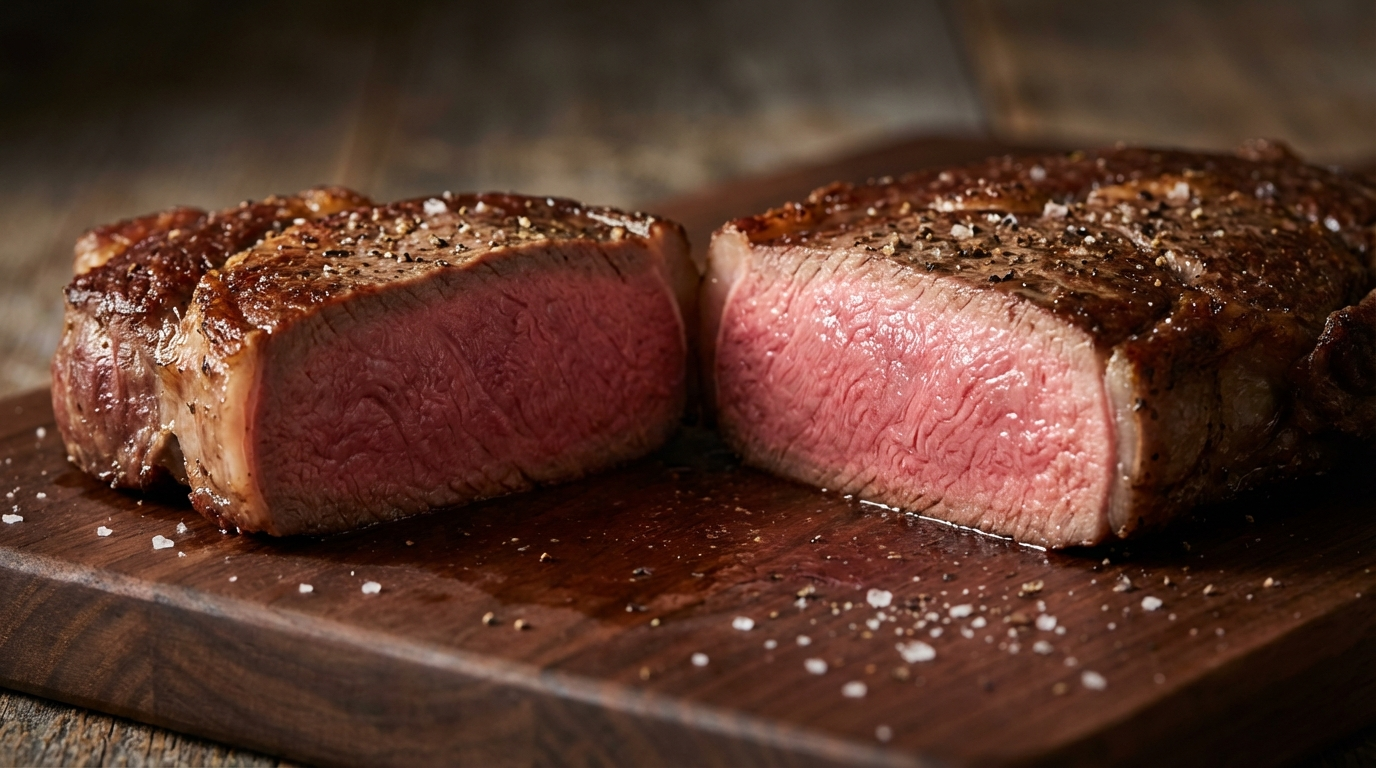
Medium-Rare: 129°F–134°F (54°C–57°C)
This is the sweet spot for the majority of steak cuts. At 130°F, myosin proteins are approximately 40% denatured — enough to firm the texture noticeably while retaining abundant juice. The color is a warm pink-red throughout. Intramuscular fat begins softening and lubricating the muscle fibers, which is why marbled cuts taste dramatically better at medium-rare than at rare.
The magic number: 131°F (55°C) is where many professional chefs land. It is warm enough to render intramuscular fat in well-marbled cuts, firm enough to have satisfying texture, and still produces a vibrant pink interior.
Best for: Ribeye, New York strip, T-bone, porterhouse — virtually every cut excels here.
Time sensitivity: Lower at this range. A steak held at 131°F for an extra 1–2 hours beyond minimum will not degrade noticeably.
Medium: 135°F–144°F (57°C–62°C)
Between 135°F and 140°F, collagen begins converting to gelatin at an accelerated rate and myosin denaturation crosses 50%. The steak is pink in the center but firmer throughout. Juice loss increases measurably — roughly 10–15% more moisture is expelled compared to 131°F.
Best for: People who prefer a firmer bite, fattier cuts where additional fat rendering improves mouthfeel (like a bone-in ribeye), and situations where you are serving guests with mixed preferences.
Watch out for: Lean cuts like filet mignon can start tasting dry at 140°F+ since they lack intramuscular fat to compensate for moisture loss.
Recommended temp: 137°F is a good compromise — still juicy, noticeable pink, but with more fat rendering than medium-rare.
Medium-Well: 145°F–155°F (63°C–68°C)
At 145°F, the steak has lost most of its pink color. Myosin is nearly fully denatured and the texture is firm throughout. Moisture loss is significant — up to 25% of the steak's original weight can be expelled as liquid. Sous vide still provides an advantage here because the gentle, even cooking minimizes the additional moisture loss that comes from thermal gradients in traditional cooking.
Best for: If you or your guests prefer well-done steak, sous vide at 150°F will produce a better result than any other method because you avoid the charred-outside, gray-inside problem entirely.
Well-Done: 156°F–165°F (69°C–74°C)
Full protein denaturation. The steak is gray-brown throughout with a firm, dry texture. Even at well-done, sous vide produces a marginally better result than traditional methods because every part of the steak reaches the same temperature simultaneously — there is no temperature overshoot at the surface.
Honest take: If someone prefers well-done steak, sous vide at 160°F with a very brief sear is the best version of that preference you can produce. No judgment — just physics.
Time Ranges by Thickness
Temperature controls doneness. Time controls two things: ensuring the center reaches equilibrium, and how long tenderizing enzymes have to work.
The minimum time is the physics minimum — how long it takes heat to conduct from the water bath to the geometric center of the steak. Going below this minimum means your center has not reached target temperature. Going above it (within reason) is fine — sous vide is forgiving because the maximum temperature is capped.
Minimum Cook Times (at 130°F–135°F)
1 inch thick: 1 hour minimum, up to 4 hours.
1.5 inches thick: 1.5 hours minimum, up to 4 hours.
2 inches thick: 2.5 hours minimum, up to 6 hours.
2.5 inches thick: 3.5 hours minimum, up to 8 hours.
3 inches thick: 4.5 hours minimum, up to 8 hours.
These times assume the steak starts refrigerator-cold (38°F). If your steak is room temperature, subtract roughly 20–30 minutes from the minimum.
The Upper Time Limit
Unlike traditional cooking, you can hold a steak at temperature for extended periods without overcooking it. But there are limits. Beyond 4–6 hours at temperatures below 140°F, protein structures continue to break down and the texture becomes noticeably softer — sometimes described as "mushy." This is especially true for tender cuts like filet mignon.
Tougher cuts with more connective tissue (like flank steak or skirt steak) can handle longer times — up to 24 hours at 130°F to break down collagen into gelatin. But for standard steakhouse cuts, keep it under 4 hours for optimal texture.
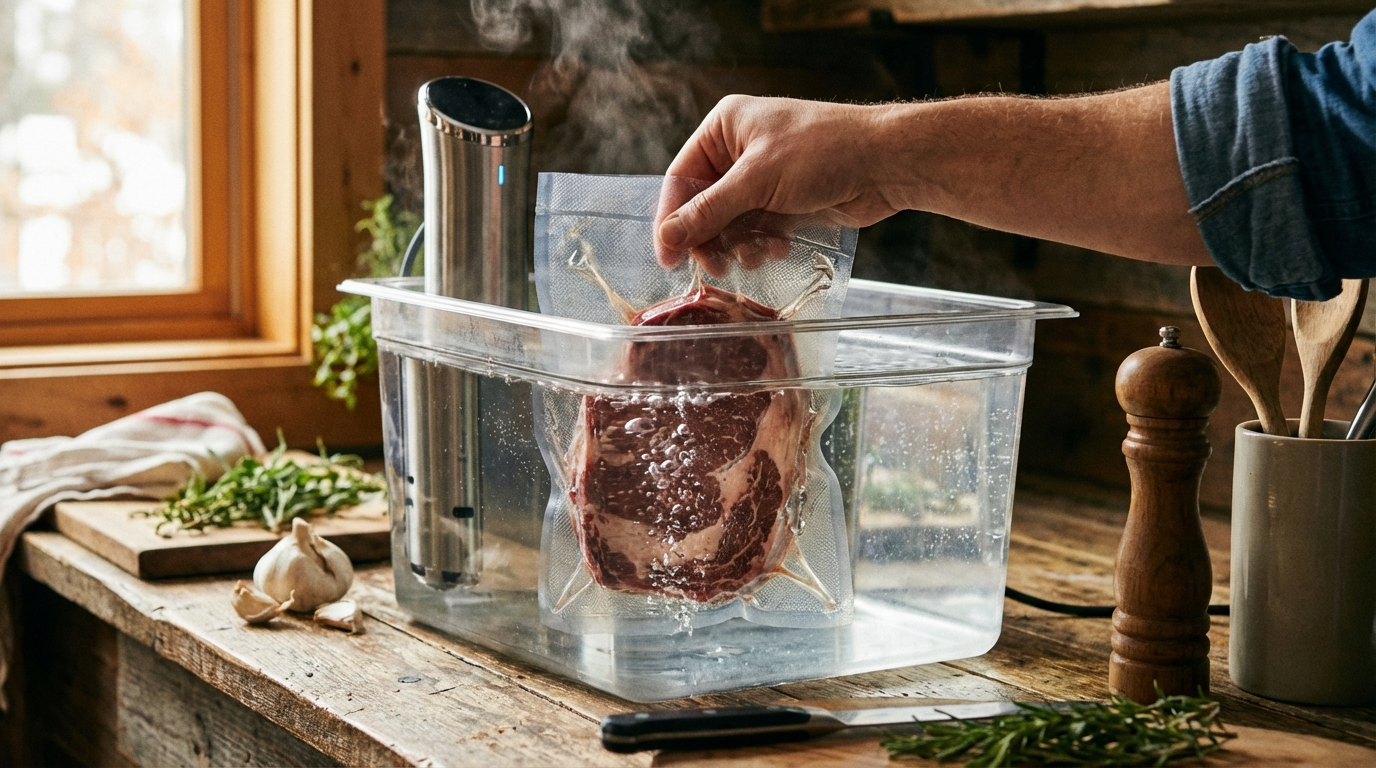
Preparing the Steak for Sous Vide
Seasoning Before vs. After
Season with salt before bagging. Salt needs time to penetrate the muscle — the extended sous vide cook provides exactly that. A steak salted and vacuum-sealed 1–2 hours of cook time will be seasoned deeper than anything you salt right before grilling.
What to add to the bag: Salt, pepper, a sprig of thyme or rosemary, and optionally a crushed garlic clove. That is it. Butter in the bag is controversial — it can actually pull fat-soluble flavor compounds away from the meat surface. Skip it.
What to avoid: Raw garlic in large quantities (can develop an unpleasant sulfur taste during extended cooks), delicate fresh herbs (basil turns brown and bitter), and any liquid marinades (they dilute the bag juices and create waste).
Bagging Methods
Vacuum sealer: Ideal. Removes all air for maximum heat transfer contact between water and meat. Use a gentle setting for tender cuts to avoid compressing the meat.
Zip-lock with water displacement: Works nearly as well. Place the steak in a quality freezer bag, seal all but one corner, slowly lower into water, and let water pressure push air out. Seal the last corner just before the zip line hits the water surface. This gets you 95%+ of the air out.
The Sear: Making Sous Vide Steak Look and Taste Complete
A sous vide steak straight from the bag looks gray and unappetizing. It tastes good — but it is missing the Maillard reaction crust that provides the complex, savory flavors we associate with a great steak. The sear is not optional.
The Rules of a Good Post-Sear
1. Dry the surface completely. Moisture is the enemy of browning. Pat the steak aggressively with paper towels on every surface. Some cooks go further and refrigerate the steak uncovered for 10 minutes after the water bath to evaporate surface moisture. This works — it gives you a better crust.
2. Use the hottest surface you can achieve. Cast iron preheated for 5+ minutes on high. A charcoal chimney grate. A torch. The goal is maximum heat for minimum time — you want crust without cooking the interior further. The steak is already at your target temperature. Every second on the heat pushes the outer layers above that target.
3. Keep it brief. 45–60 seconds per side, plus 15 seconds on each edge. Total sear time should not exceed 3 minutes. If your pan is hot enough, you will have a deep mahogany crust in under 90 seconds total.
4. Butter baste at the end. In the last 20 seconds, add a tablespoon of butter, a crushed garlic clove, and a thyme sprig. Tilt the pan and spoon the foaming butter over the steak. This adds flavor and helps even out the browning on any spots the direct contact missed.
Sear Methods Ranked
Cast iron skillet: The standard. Excellent heat retention means the pan does not cool down when the cold steak hits it. Produces even browning across the flat surfaces.
Charcoal chimney: Place a grate directly over a lit chimney starter full of lump charcoal. This produces temperatures of 800°F+ and creates a sear in 30 seconds per side. Aggressive but effective — best for thick cuts where you want minimal heat penetration.
Torch (Searzall or similar): Good for edges and spots a flat pan misses. Not ideal as the primary sear method — it is slow and can leave a torch-fuel taste if you rush it.
Deep fry: Flash-frying the steak in 400°F oil for 30–45 seconds produces an extraordinary crust with virtually zero additional internal cooking. Unconventional but scientifically sound.
Cut-Specific Temperature Recommendations
Not every steak is the same. Fat content, connective tissue, and muscle fiber density all affect the ideal sous vide temperature.
Ribeye and Bone-In Ribeye
Recommended: 137°F (58.3°C) for 2 hours. The higher temperature renders the significant intramuscular fat in a ribeye, transforming it from waxy to silky. At 130°F, ribeye fat remains slightly firm and coats your mouth unpleasantly. At 137°F, it is luscious.
New York Strip
Recommended: 131°F (55°C) for 2 hours. Moderate marbling and a pronounced fat cap. The standard medium-rare temperature works perfectly here. The fat cap will not fully render at any sous vide temperature — trim it before bagging or sear the fat cap edge separately.
Filet Mignon / Tenderloin
Recommended: 130°F (54.4°C) for 1.5 hours. Extremely lean with minimal connective tissue. This cut is already tender — you are using sous vide purely for temperature precision. Do not exceed 3 hours or the texture becomes too soft. Keep the temperature at or below 131°F to preserve the delicate, buttery quality.
Flank Steak
Recommended: 131°F (55°C) for 12–24 hours. Flank is a working muscle with significant connective tissue. The extended time at temperature allows collagen to convert to gelatin, transforming a tough cut into something fork-tender while maintaining a medium-rare color. This is where sous vide truly shines — you cannot achieve this result any other way.
Skirt Steak
Recommended: 130°F (54.4°C) for 4–8 hours. Similar logic to flank but slightly less connective tissue. Four hours minimum to soften the fibers. Sear over the highest heat you have — skirt steak's thin profile means it can overcook quickly during searing.
Common Mistakes and How to Avoid Them
Using too low a temperature for fatty cuts. This is the most common error. Ribeye at 130°F is technically medium-rare, but the unrendered fat makes it inferior to 137°F. Match the temperature to the fat content, not just the color you want.
Skipping the dry step before searing. Surface moisture converts to steam, which cools the pan and prevents Maillard browning. You cannot get a good sear on a wet steak. Take the extra 60 seconds to pat it dry.
Searing too long. The whole point of sous vide is precision. A 3-minute sear on each side defeats the purpose — you are adding a gray band right back. Hot pan, brief sear, done.
Adding butter to the bag. It feels logical but food science says otherwise. Butter in the bag absorbs aroma compounds (particularly volatile flavor molecules) away from the meat. Season the meat, seal it, and add butter during the sear instead.
Cooking from frozen without adjusting time. You absolutely can cook frozen steaks sous vide — add 50% more time to account for the thawing phase. A 2-inch frozen steak at 131°F needs roughly 3.5–4 hours instead of 2.5.
Frequently Asked Questions
Frequently Asked Questions
What is the best sous vide temperature for steak?
131°F (55°C) is the most versatile temperature for most steak cuts, producing a warm pink medium-rare with excellent juice retention. For fattier cuts like ribeye, 137°F (58.3°C) renders intramuscular fat more effectively.
How long should I sous vide a 1-inch steak?
A 1-inch steak needs a minimum of 1 hour to reach equilibrium at your target temperature. It can safely stay in the bath for up to 4 hours without quality degradation.
Can I sous vide steak from frozen?
Yes. Add 50% more time to account for thawing. A frozen 2-inch steak at 131°F needs approximately 3.5–4 hours instead of the usual 2.5 hours.
Do I need a vacuum sealer for sous vide?
No. The water displacement method with a quality zip-lock freezer bag removes 95%+ of the air and works nearly as well as vacuum sealing for cook times under 4 hours.
Why does my sous vide steak look gray before searing?
Without exposure to temperatures above 300°F, the Maillard reaction cannot occur. The steak is fully cooked and safe to eat — it just needs a 60-second sear per side in a ripping hot pan to develop color and crust.
What is the difference between sous vide steak temp and carryover cooking?
Sous vide eliminates carryover cooking from the equation. The steak reaches your exact target temperature and stays there. With traditional grilling, you must account for 5–10°F of temperature rise after removing from heat. Sous vide removes that variable entirely.
More Expert Guides
Steak Doneness Temperature Guide: The Science of Every Level from Rare to Well Done
Every degree matters. This science-backed guide covers the exact internal temperatures for every steak doneness level, why each temperature produces a different texture, and how to nail your target every time.
14 min readDirect vs Indirect Heat Grilling: The Science of Two-Zone Cooking
Direct heat sears. Indirect heat roasts. Understanding the physics of each — and when to combine them — is the foundation of every great grilling technique.
14 min readResting Meat After Cooking: The Science of Why It Makes Every Steak Juicier
Resting meat after cooking is not optional — it is physics. Here is exactly what happens inside the steak during those crucial minutes and how long to rest every cut.