The Science of Perfect Grilled Chicken Breast: Why Yours Keeps Drying Out
Chicken breast is the most overcooked protein in America. It is lean, it is thick in some places and thin in others, and most people treat it like a steak — which is exactly why they end up with something resembling a hockey puck. The science of grilling chicken breast is fundamentally different from grilling beef, and understanding those differences is the key to juicy, perfectly cooked results every single time.
As a food scientist, I find chicken breast fascinating precisely because it is so unforgiving. Beef has fat to bail you out. Pork has collagen. Chicken breast has almost nothing — just lean muscle fiber and water. Get the science right, and it is one of the best things off a grill. Get it wrong by even a few degrees, and the physics of protein denaturation will punish you.
Why Chicken Breast Dries Out: Protein Denaturation Explained
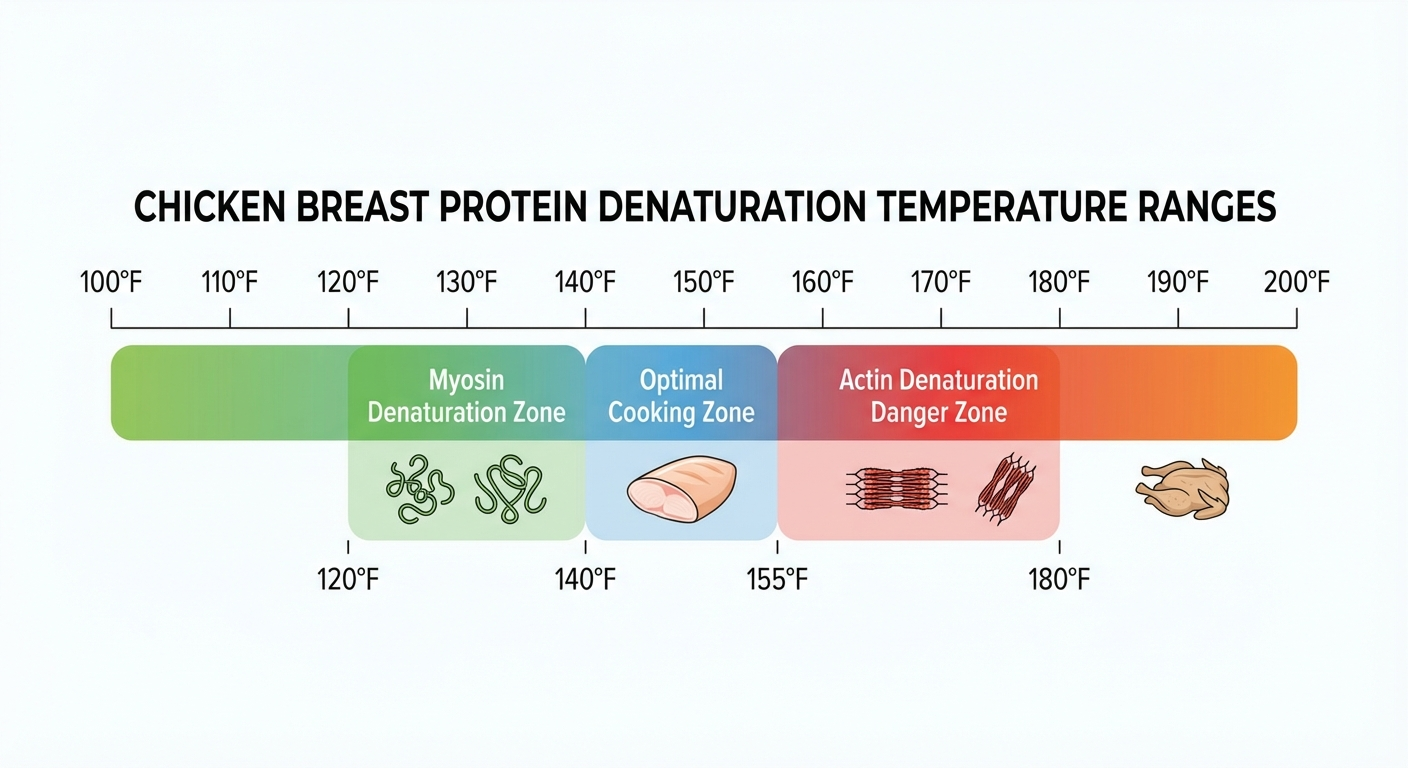
To understand why chicken breast is so easy to overcook, you need to understand what happens to muscle proteins at different temperatures. Chicken breast is primarily composed of two proteins: myosin and actin. These proteins denature — meaning they unfold and restructure — at different temperatures, and that difference is everything.
Myosin begins denaturing at around 120°F (49°C) and is largely denatured by 140°F (60°C). When myosin denatures, it transforms the raw, translucent meat into opaque, firm, cooked chicken. This is the good denaturation — the one that makes chicken safe and pleasant to eat.
Actin begins denaturing at around 150°F (66°C). When actin denatures, the muscle fibers contract violently and squeeze out moisture like wringing a wet towel. This is the bad denaturation — the one that turns your chicken breast into cardboard.
The sweet spot sits in the gap between these two temperatures. Between 140°F and 150°F, myosin has fully denatured (the chicken is cooked and safe to eat after being held at temperature), but actin has not yet contracted enough to expel significant moisture. This is where juicy grilled chicken lives.
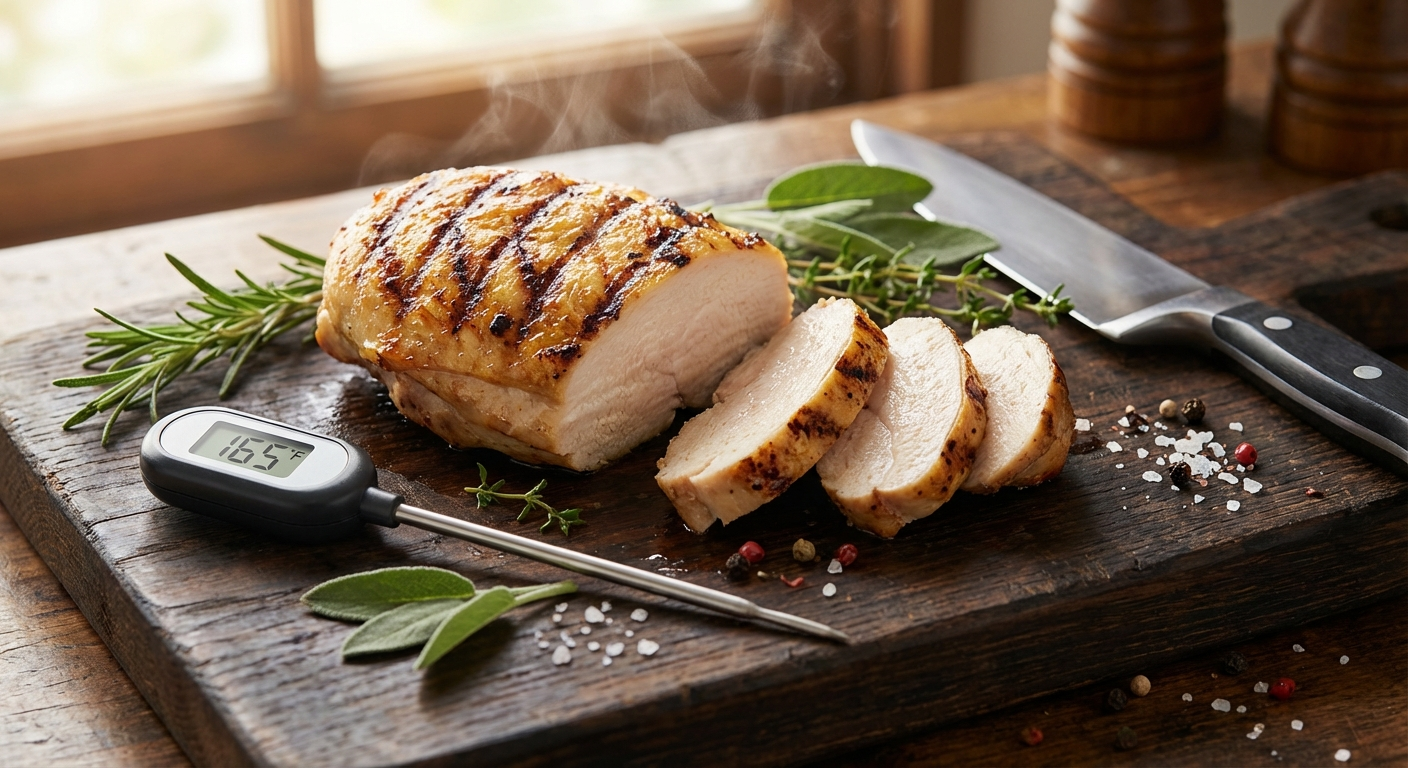
The 165°F Myth: What the USDA Actually Says
For decades, the standard advice has been to cook chicken to an internal temperature of 165°F (74°C). This number comes from the USDA, and it is not wrong — but it is deeply misleading without context.
The USDA's 165°F guideline represents the temperature at which instantaneous pasteurization of Salmonella occurs. At 165°F, harmful bacteria are destroyed in less than one second. It is the simplest, most foolproof recommendation the agency can make.
But pasteurization is not just about temperature — it is about time at temperature. The same level of food safety can be achieved at lower temperatures if the meat is held there long enough:
- 165°F (74°C): Instantaneous pasteurization
- 160°F (71°C): Hold for 14.8 seconds
- 155°F (68°C): Hold for 47.7 seconds
- 150°F (66°C): Hold for 2.5 minutes
- 145°F (63°C): Hold for 8.4 minutes
These numbers come directly from the USDA's own Appendix A of the Meat and Poultry Processing Guidelines. They are the same standards that commercial food processors use. When you pull chicken breast off the grill at 155°F and rest it for 5 minutes, carryover cooking will push the internal temperature up while the hold time at elevated temperatures ensures complete pasteurization. The chicken is every bit as safe as the one cooked to 165°F — and dramatically juicier.
Brining: The Physics of Moisture Insurance
Before your chicken breast ever touches the grill, you have an opportunity to fundamentally change its moisture-retention capability through brining. Whether you use a wet brine or a dry brine, the underlying science is the same: salt restructures muscle proteins to hold onto water more effectively during cooking.
When salt penetrates muscle tissue, it partially dissolves the myosin protein filaments. These dissolved proteins form a gel-like matrix that traps water. In a wet brine (3-6% salt solution), osmosis also drives additional water into the muscle cells, increasing the total moisture content by 6-10% by weight.
Dry brining works through a different mechanism. Salt draws moisture to the surface initially through osmosis, then that moisture dissolves the salt and creates a concentrated brine that gets reabsorbed into the meat over time. The advantage of dry brining is that you are restructuring proteins without adding excess water, which means better browning on the grill.
For grilled chicken breast, I recommend a 45-minute dry brine as the minimum effective dose. Use ¾ teaspoon of kosher salt per pound of chicken. This gives the salt enough time to penetrate the outer ¼ inch of meat and begin protein restructuring without over-salting or making the texture mushy.
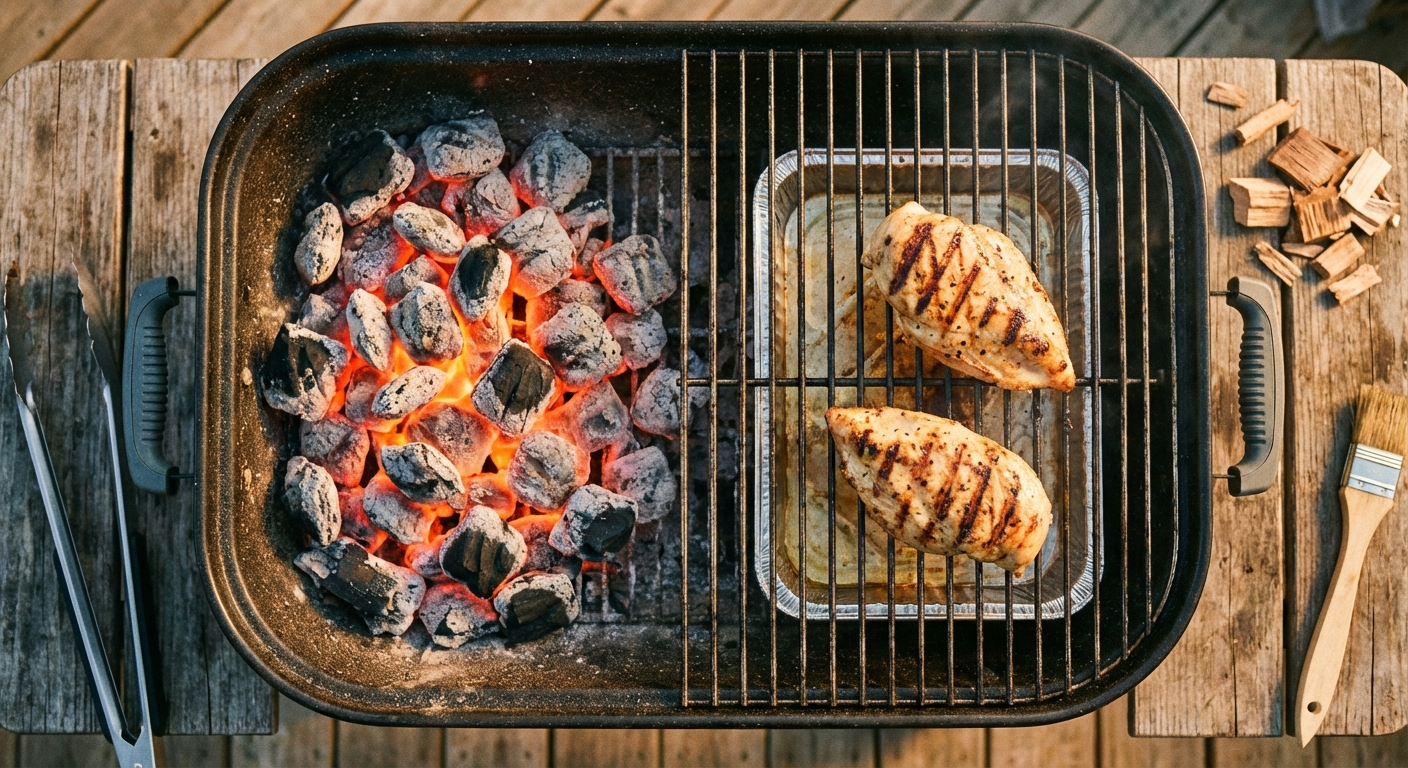
Grill Setup: Two-Zone Configuration
The single most important technique for grilling chicken breast is the two-zone fire. Chicken breast is an awkward shape — thick on one end, thin on the other. A single-temperature cooking surface guarantees that the thin end will be overcooked by the time the thick end is done.
Set up your grill with a hot zone (direct heat, 450-500°F) and a cool zone (indirect heat, 325-350°F). The hot zone is for searing and creating Maillard browning. The cool zone is for gentle cooking that brings the interior to temperature without overshooting.
The method: Start the chicken breast on the hot zone for 2-3 minutes per side. You want grill marks and surface browning, but do not try to cook the chicken through on direct heat. Once you have color on both sides, move the chicken to the cool zone, close the lid, and let convective heat do the work. The gentle, indirect heat gives you control and time to hit your target temperature without blowing past it.
The Thickness Problem: Butterflying and Pounding
A chicken breast straight from the package is an engineering nightmare for even cooking. One end might be 2 inches thick while the other tapers to half an inch. The thin end will be at 180°F while the thick end is still at 145°F. No technique can overcome bad geometry.
You have two solutions, both rooted in the same principle — creating uniform thickness so heat transfer is consistent across the entire surface area:
Butterflying: Slice the breast horizontally through the thickest part, opening it like a book. This roughly halves the maximum thickness and dramatically improves uniformity. A butterflied breast also cooks in nearly half the time, reducing the window for moisture loss.
Pounding: Place the breast between plastic wrap and pound it to an even ¾-inch thickness. This is more aggressive but creates the most uniform surface possible. Every point on the chicken is the same distance from the heat source, which means every point reaches the target temperature at the same time. No overcooked edges. No undercooked centers.
I strongly recommend one of these techniques for any chicken breast thicker than 1.5 inches. The science does not lie: uniform thickness equals uniform doneness.
Carryover Cooking: Pull Temperature Science
Carryover cooking affects chicken breast differently than beef. Because chicken breast is lean and lacks the thermal mass of a marbled steak, carryover is typically 5-8°F rather than the 10-15°F you might see in a thick ribeye.
This means your pull temperatures should be:
- Target 155°F (juicy, time-pasteurized): Pull at 150°F
- Target 160°F (traditional safe): Pull at 153-155°F
- Target 165°F (USDA instant-kill): Pull at 158-160°F
Rest the chicken for 5-8 minutes after pulling. This accomplishes two things: the temperature continues to rise and equalize (completing pasteurization at the lower pull temperatures), and the muscle fibers relax slightly, reabsorbing some of the moisture that was driven toward the center during cooking. Cutting into chicken immediately off the grill will release a flood of juice that should have stayed in the meat.
Charcoal vs. Gas: Does It Matter for Chicken?
For chicken breast specifically, the choice between charcoal and gas matters less than you might think. Unlike beef, where the Maillard reaction and fat-drip flare-ups contribute significant flavor, chicken breast benefits primarily from temperature control — and gas grills offer more precision.
That said, charcoal does provide one advantage: higher maximum heat for the initial sear. If you are using the two-zone method, a charcoal grill can produce 600°F+ direct heat that creates faster, deeper browning in less time. Less time searing means less heat penetration, which means juicier results.
If you use gas, preheat for a full 10-15 minutes with all burners on high, then turn one side down for your cool zone. The extra preheat time ensures the grate itself is hot enough for proper searing — a common failure point with gas grills is an insufficiently hot grate.
Common Mistakes: The Science of Failure
Understanding why common mistakes fail helps reinforce the correct approach:
Cooking cold chicken from the fridge: A 38°F chicken breast on a 500°F grill creates a massive thermal gradient. The surface overcooks before the center even begins to warm up. Let the chicken sit at room temperature for 20 minutes before grilling. This reduces the gradient and shortens cooking time, meaning less total heat exposure and more moisture retained.
Pressing the chicken with a spatula: This is the single worst habit in grilling. When you press down on chicken breast, you physically squeeze moisture out of the muscle fibers. That sizzle you hear is not "better contact" — it is juice vaporizing on the grill grates. Every drop that leaves the chicken is moisture your guests will not taste.
Cutting to check doneness: Slicing into chicken to see if it is done releases juice and, worse, creates a channel for moisture to escape during the remaining cook time. Use a calibrated instant-read thermometer. There is no substitute. Insert it into the geometric center of the thickest part. If you butterflied or pounded the chicken to even thickness, any central point will give you an accurate reading.
Skipping the rest: Pulling chicken at 158°F and slicing immediately means you are eating chicken at 158°F — it never reached 165°F for instantaneous pasteurization, and you did not give it time at 155°F+ for time-temperature pasteurization. Resting is not optional. It is both a safety measure and a quality measure.
The Complete Method: Step by Step
Here is the science-backed protocol for perfectly grilled chicken breast:
1. Prep (45 minutes before grilling): Dry brine with ¾ tsp kosher salt per pound. If breasts are uneven, butterfly or pound to ¾-inch uniform thickness. Leave uncovered in the refrigerator for 30 minutes, then pull out 15 minutes before grilling.
2. Grill setup: Create a two-zone fire. Hot zone at 450-500°F. Cool zone at 325-350°F. Clean and oil the grates.
3. Sear (2-3 minutes per side): Place chicken on the hot zone. Do not move it for 2-3 minutes. Flip once. You want deep golden-brown color — the Maillard reaction needs uninterrupted contact with the hot grate.
4. Indirect finish (6-10 minutes): Move chicken to the cool zone. Close the lid. The convective heat will bring the interior to temperature gently. Check temperature at 6 minutes, then every 2 minutes.
5. Pull at 150-155°F: Remove from grill. Tent loosely with foil.
6. Rest 5-8 minutes: Carryover will push the final temperature to 157-162°F. Time at temperature ensures pasteurization. Juices redistribute.
7. Slice against the grain: Chicken breast has visible muscle fiber direction. Cutting perpendicular to those fibers shortens them, making each bite more tender.
Final Thoughts
Grilled chicken breast is not a lesser protein. It is a precision exercise — one where understanding the science gives you an enormous advantage over instinct alone. The gap between myosin and actin denaturation is your operating window. Brining gives you insurance. Two-zone grilling gives you control. And a thermometer gives you certainty.
Stop guessing. Start measuring. The difference between dry chicken and perfect chicken is about 10°F — and now you know exactly where that window is.
More Expert Guides
Low and Slow vs Hot and Fast BBQ: The Science of When Each Method Wins
Two schools of barbecue. One cooks brisket at 225°F for 14 hours. The other cranks to 325°F and finishes in 6. Both produce championship-caliber results — but the physics behind each method are completely different.
13 min readThe Science of Spatchcock Chicken on the Grill: Why Flattening Produces Better Results
Removing the backbone and flattening a whole chicken isn’t just a shortcut — it’s an engineering solution to poultry’s biggest thermal problem. Here’s the science behind why spatchcocking delivers crispier skin and juicier meat every time.
14 min readThe Science of the Perfect Grilled Burger: Fat Ratio, Temperature, and Technique
Why do some burgers come off the grill juicy and flavorful while others turn into dry hockey pucks? The answer is thermodynamics, fat chemistry, and a few counterintuitive techniques backed by science.